Reading view

How to Design a Guest Bedroom to Make Anyone Feel at Home

cozy guest bedroom ideas

Of all the rooms to style (and sustain) in my home, the guest bedroom is where things seem to click. Unlike the primary, there’s less pressure to get things just right—it’s an opportunity to get more playful with patterns, lighting, and design styles. And because it’s the space in our home designed to be a welcome invitation to others, there’s a motivation to make it a warm, cozy retreat when guests come to visit.

Because the best guest bedroom ideas don’t just focus on styling, they prioritize comfort. When someone stays in your home, what they remember most isn’t the decor—it’s how they felt. Did they sleep well? Did the room feel peaceful? Were they taken care of?

With a few thoughtful touches—from cozy bedding to practical storage—you can transform even a small guest room into a warm, welcoming retreat.

textured guest bedroom ideas

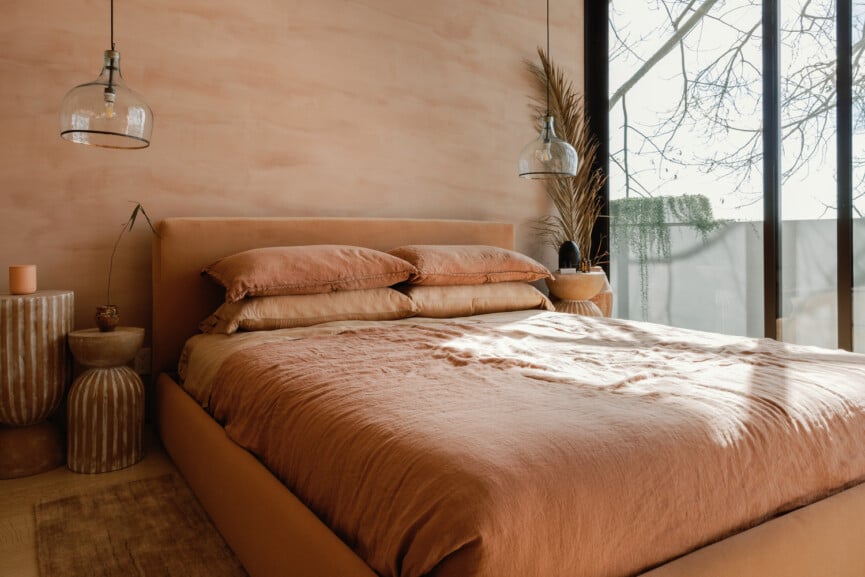
Prioritize a Bed That Makes Sleep Easy

If there’s one place to focus your energy in a guest room, it’s the bed. The most important thing a guest will do in this room is sleep, so the bed is more than just a pretty focal point. It should be inviting—and deliver on comfort.

Start with clean, comfortable bedding. Soft sheets, supportive pillows, a thick duvet, and an extra blanket at the foot of the bed are the perfect base. You never know if guests run warm or cold at night, so layering textures instantly makes the space feel thoughtful and cozy.

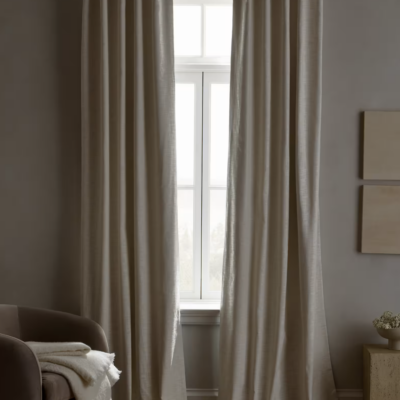
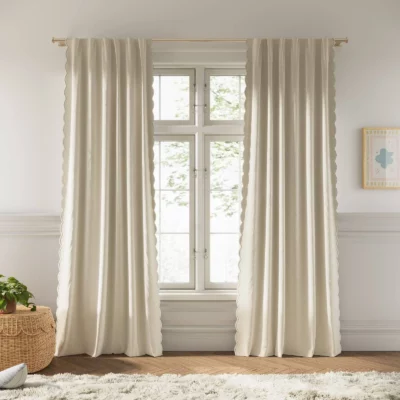
Add Blackout Curtains for Better Sleep

A beautiful guest room means very little if your guests can’t sleep well. Next to a comfortable bed, light and noise can make or break a good night’s sleep. Blackout curtains or lined drapes help block early morning light and make it easier for guests to rest—especially if they’re adjusting to a new environment or time zone.

Even in lighter, airier spaces, choosing window treatments that soften or darken the room at night can make a noticeable difference. And if blackout curtains feel too heavy for your aesthetic, look for layered window treatments that combine sheer curtains with a thicker panel for nighttime.

guest bedroom color ideas

Choose a Calming Color Palette

Guest rooms tend to feel most welcoming when the palette is soft and neutral. Light blues, warm whites, and sandy beiges create a calm backdrop that appeals to most people and helps the space feel brighter—especially if the room is on the smaller side. That said, don’t be afraid of being more playful in the space, especially if you’ve got an idea that might not make sense in another room—a color wash you want to try, bedding that feels less safe, or wall art that needs a home. You can still simplify around the unexpected design touch by keeping accents tonal or soft.

Keeping the palette simple also allows cozy textures like linen bedding, woven accents, and soft throws to take center stage. The result is a room that feels peaceful, uncluttered, and easy to relax in.

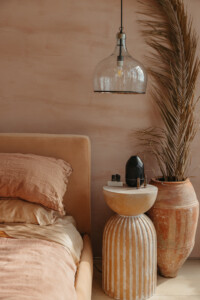
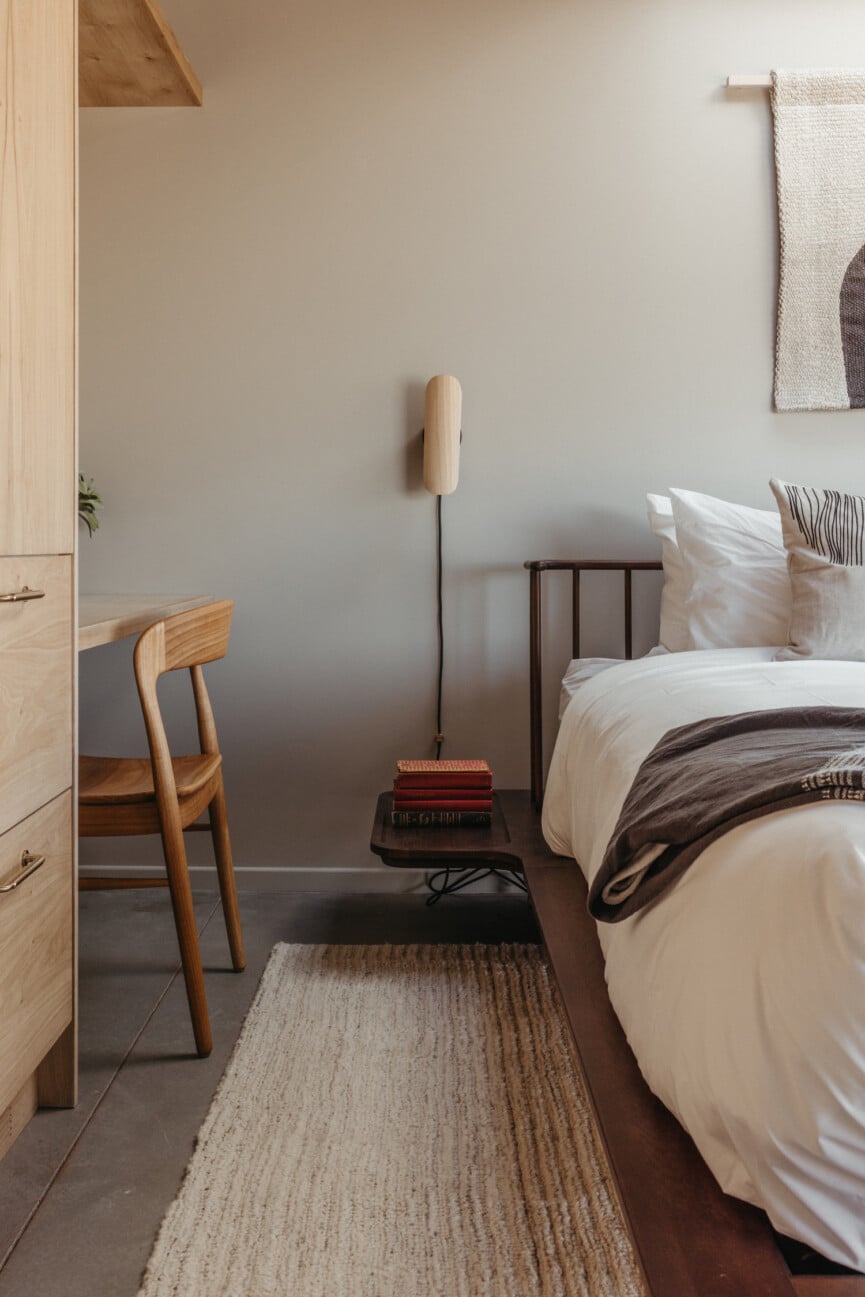
Layer the Lighting for Comfort and Flexibility

Lighting has a huge impact on how a room feels—especially at night. Instead of relying on one overhead light, layer a few different sources so guests can adjust the space to their needs. A bedside lamp makes it easy to read before bed, while a softer ambient light creates a calm, relaxing atmosphere.

If space is tight, consider wall-mounted lighting instead of table lamps. It frees up surface space while still giving guests the ability to control their lighting without getting out of bed. Warm, dimmable light instantly makes a guest room feel cozier and more restful.

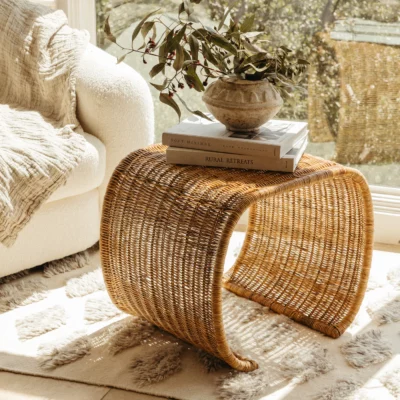
Make a Small Guest Bedroom Feel Spacious

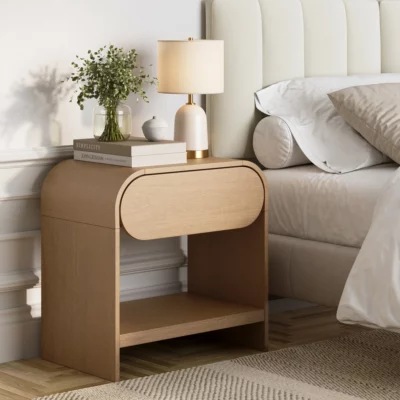
Guest bedrooms are often smaller rooms in the house, but a few thoughtful choices can make them feel much more comfortable. Look for furniture with a smaller footprint—taller nightstands, round ottomans, or benches that double as seating and storage. Wall-mounted lighting can also free up valuable surface space. This allows the bed to remain the focal point while still leaving room for guests to move around comfortably.

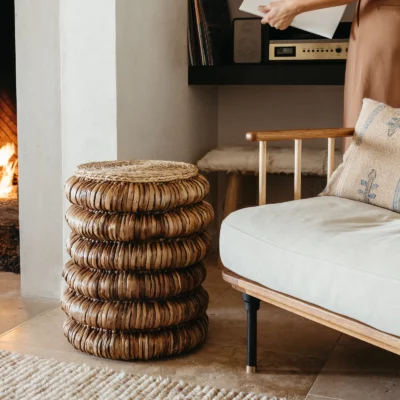
Include a Luggage Rack or Bench

One of the simplest ways to elevate a guest room is by giving visitors a place to open their suitcase. A folding luggage rack, bench at the foot of the bed, or even a small stool provides a convenient landing spot for bags and prevents guests from having to place their suitcase on the floor or bed. This small addition makes unpacking easier—and keeps the room feeling tidy throughout their stay.

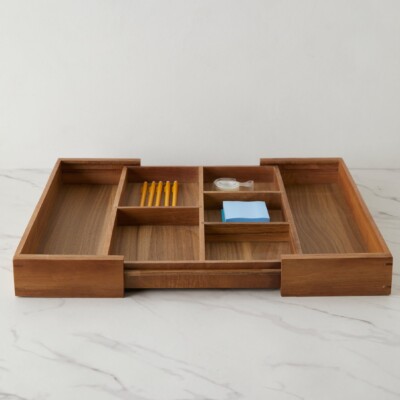
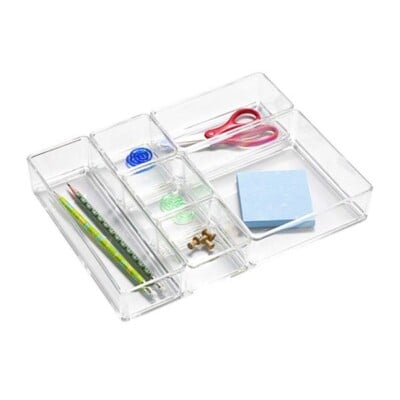
Add Storage So Guests Can Actually Unpack

Even for a short stay, having a place to put things makes guests feel more settled. You don’t need a full dresser to make this happen. An empty drawer, a luggage rack, or a few wall hooks can be enough to help guests unpack and organize their belongings.

Smaller nightstands can also work well in guest rooms since most visitors only need space for a few essentials. In tighter spaces, try pairing a nightstand on one side of the bed with a small ottoman or stool on the other—it doubles as both a drop spot and extra seating.

The goal is simple: create a space where guests don’t feel like they have to live out of their suitcase.

guest bedroom nightstand ideas

Create a Thoughtful Nightstand Setup

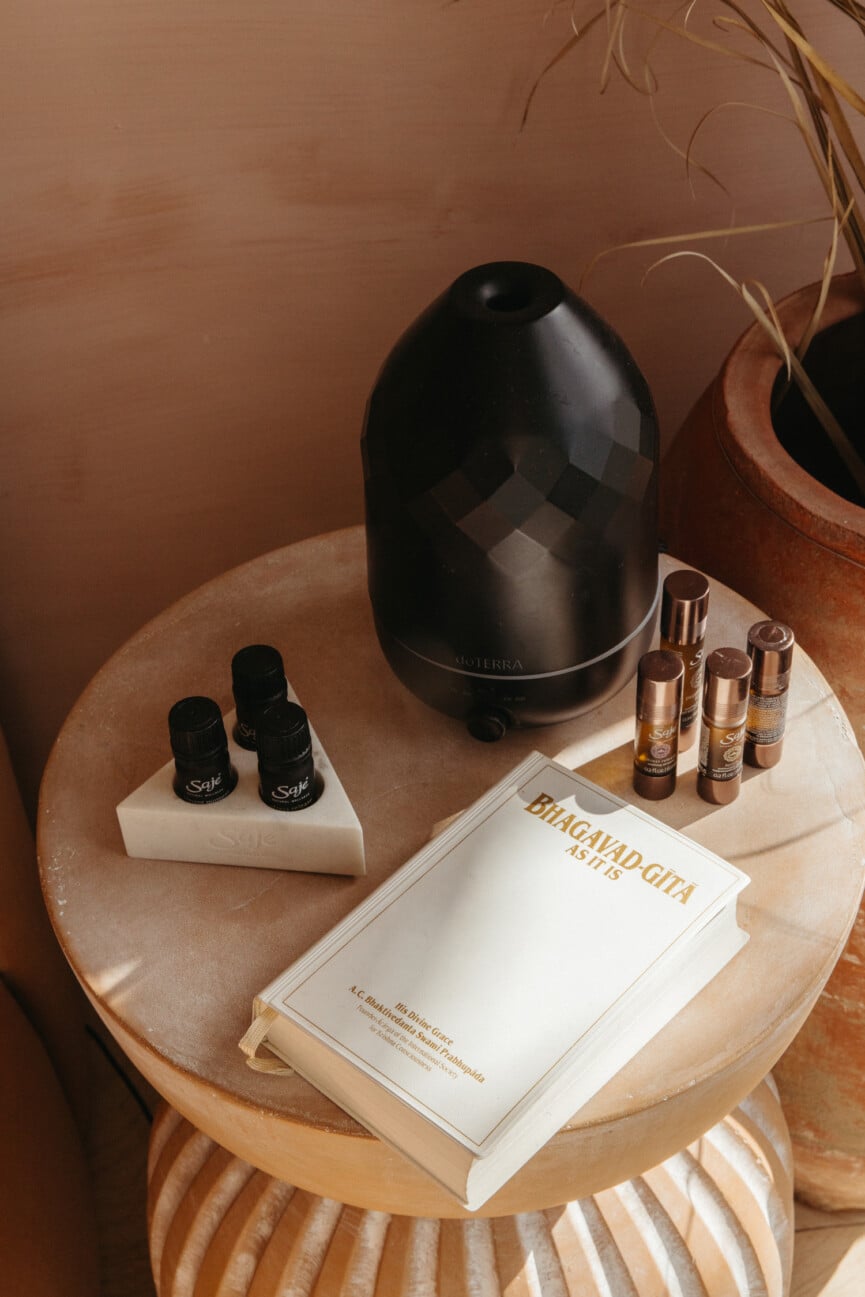
One of the easiest ways to make guests feel cared for is through the small details. A thoughtfully arranged nightstand might include a reading lamp, a glass of water, tissues, a small noise machine, and a place to charge a phone. These are the little conveniences people often miss when they’re away from home.

It’s also helpful to keep a small kit of essentials nearby—things like toothpaste, cotton pads, or extra hair ties in case someone forgot something while packing. These quiet touches make a stay feel effortless.

Offer Small Creature Comforts

The most memorable guest rooms often include a few unexpected comforts. A basket with extra washcloths, cozy slippers, or a soft throw blanket instantly makes guests feel at ease. Even something as simple as a plush robe can make the room feel more like a boutique hotel than a spare bedroom.

One of my favorite ways to make guests feel at home is to place a book or magazine on the nightstand—something they can flip through as they wind down at night. These small gestures feel simple, but a little thoughtfulness goes a long way.

Keep Fresh Towels Within Reach

Ever stepped out of the shower at someone else’s house only to realize you don’t know where the towels are? Folded towels on the bed, draped over a bench, or neatly stacked in a basket signal that everything they need has already been thought of. Personally, I keep the guest towels separate and tucked away in the guest dresser, so they’re always fresh and ready to go (and so my kids don’t destroy them in between visits).

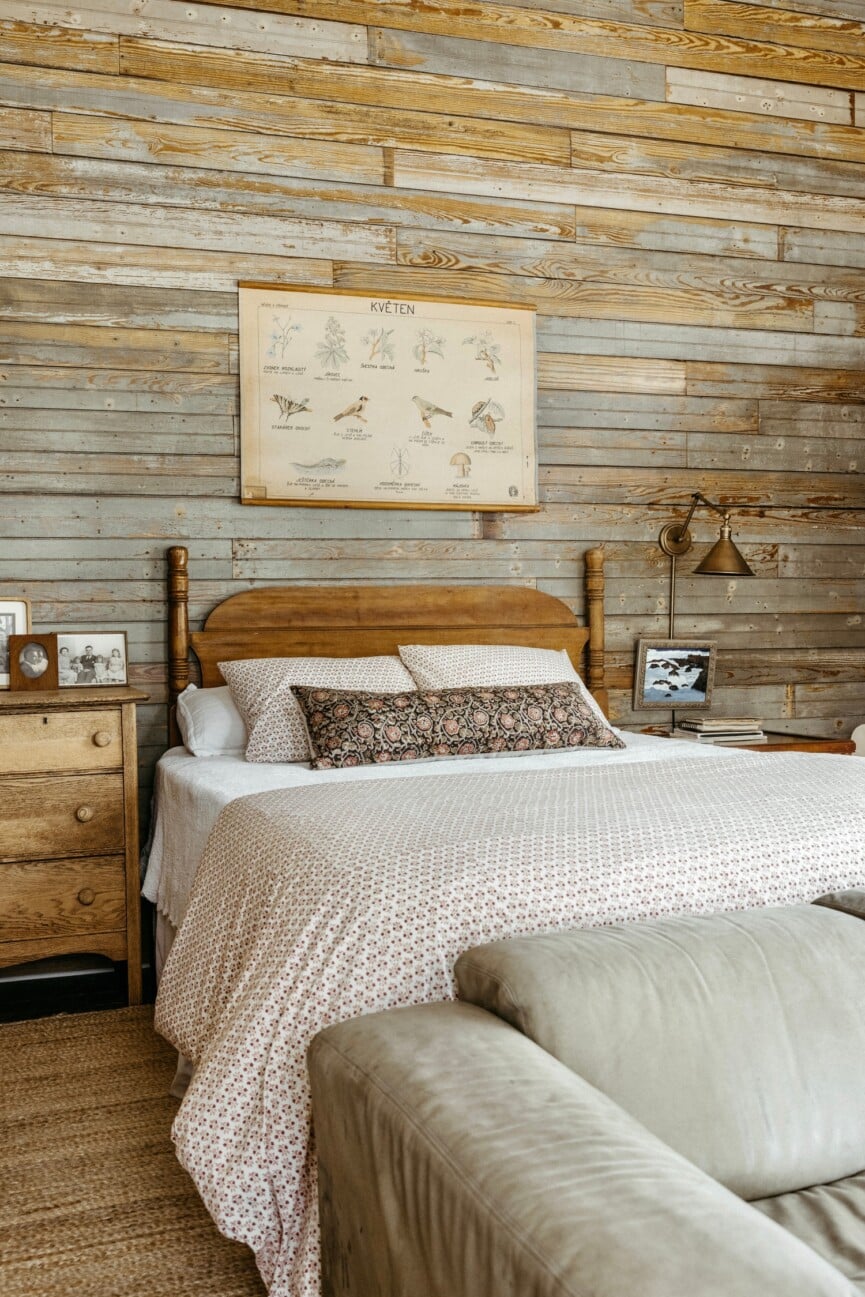
Bring in Soft Textures

Texture is what transforms a guest room from functional to cozy. Layering soft materials—linen bedding, woven blankets, plush throws, and textured pillows—instantly warms up the space and makes it feel inviting. These tactile elements also help neutral color palettes feel more interesting without overwhelming the room.

Think of texture as the finishing touch that makes a guest room feel lived-in and welcoming rather than overly styled.

Add a Mirror and a Few Getting-Ready Essentials

I’ve found that the single thing most guest rooms miss is simply a mirror. A full-length mirror or wall mirror helps guests check outfits and get dressed without needing to occupy the bathroom for long stretches of time. If space allows, placing a small tray nearby with a few basics—like a lint roller, tissues, or a small jewelry dish—can make the space feel even more thoughtful.

Add Personal Touches That Make Guests Feel Welcome

The most memorable guest rooms feel personal, not staged. This is the fun part: Fresh flowers on the nightstand, a favorite candle, or a small stack of books instantly add warmth to the space. Even a simple handwritten note welcoming guests can make the room feel thoughtful and intentional.

The Best Guest Bedroom Ideas Focus on Comfort

At the end of the day, the most memorable guest rooms aren’t the most elaborate—they’re the ones that make people feel cared for. A comfortable bed, soft lighting, thoughtful amenities, and a few personal touches go a long way toward creating a space where guests can truly relax. Because when someone feels rested, welcome, and at ease in your home, that’s the experience they’ll carry with them long after their visit ends.

This post was last updated on March 14, 2026, to include new insights.

The post How to Design a Guest Bedroom to Make Anyone Feel at Home appeared first on Camille Styles.

  •  

Ethereal Kites by Hai-Wen Lin Transform into Elegant Garments and Sculptures

Ethereal Kites by Hai-Wen Lin Transform into Elegant Garments and Sculptures

In works that merge sculpture, fashion, and kite-making, Hai-Wen Lin traverses the thresholds that connect one’s physical self, the mind, and the elements. The artist describes their practice as “an act of reorienting: looking back, looking forward, looking in, looking up.”

Using a wide range of materials, Lin creates vibrant, abstract compositions in textile often manipulated with cyanotype patterns or dyed with natural hues such as indigo and turmeric. They make kites “that speak the language of clothing,” blurring definitions of craft, art, garments, and acts of play.

A kite artwork by Hai-Wen Lin flies in the sky.
“October 8th 2:56-3:56pm Wicker Park; a picnic together // we probably shouldn’t feed the sparrows” (2022), tannic acid-toned cyanotype on muslin, acrylic, soda ash, bamboo, thread, gold chain, wind, green grass, time to kill, hungry sparrows, turbos flamas, a loved one to keep company, conversations that needn’t arrive anywhere, 63 x 63 x 5 inches

Lin has long been interested in chance operations, documentation of daily life, and ways of releasing control. They artist first learned to sew as a way to explore and navigate questions of gender. During graduate school, they landed on the concept of a kite as a way of loosening up in terms of research and getting out into the open—literally embracing the wind. They were thus inspired by a stirring question: “What does it mean to care for, drape, dress, and accommodate change and instability?”

Lin’s pieces employ an array of materials and processes, such as discarded paintings, a variety of fabrics, jewelry findings, and more. “Two Can Share Heaven,” for example, incorporates dyed cotton, faux fur, polyester, velvet, and silk—the latter of which harkens to historical fashion.

The artist also occasionally includes experiential, ephemeral additions in the works’ materials lists, such as “a burning sensation, a desire to be lost” in a piece titled “Sunday, April 2nd 5:13–7:31pm,” among others, and titles sometimes reflect the dates and times when the kites were worn as garments.

Artist Hai-Wen Lin wades into the sea wearing a handmade, mixed-media garment that doubles as a kite.
“Sunday, April 2nd 5:13–7:31pm” (2023), cyanotype on silk and cotton, developed in lakewater, steeped in black tea, feathers, beads, thread, bells, wood, gold, enamel, crystals, copper, brass, ceramic, dirt, flowers, sunlight, sweat, sand, rust, dust, a shivering body, a burning sensation, a desire to be lost, 90. 96 x 12 inches

Lin is fascinated by the tradition of Japanese paper sode dako, or “kimono kites,” which resemble the silhouette of the timeless robes. “It’s very simple, but the idea of the body in flight, is of course a powerful image,” Lin says, adding:

When I was young, my dad would have us write wishes on pieces of paper and send them up the kite lines when we flew them. If they disappeared when you reeled the kite back in, it meant the wish had been granted. So the kites have always been about a sense of wish-making. I think clothing offers a similar sense of aspiration for a lot of people.

Lin’s kites can just as easily be described as textile sculptures or apparel. They drape beautifully in exhibition spaces like abstract tapestries, severed from their free-flying, outdoor associations. They wrap around the human form like elegant, ethereal, shapeshifting mantles.

Two people standing a meadow at either sunrise or sunset, wearing a two-person artistic garment.
“Two Can Share Heaven” (2024), turmeric and indigo-dyed cotton, donated fabrics, discarded paintings, faux fur, silk, velvet, polyester, jewelry chain, split rings, thread, cord, wood, 110 x 80 inches. Models: the artist and Margaret Wright

“What continues to interest me in this dialogue is the ways in which clothing and weather have always been in conversation,” Lin says, continuing:

Clothing is an interface that delineates our bodies from the environment, so I’m interested in reversing and reorienting that relationship. What would it mean to clothe the weather instead? I often refer to my works as clothing for the wind. I think of dress and clothing as a form of care. I love that we forecast weather and that we forecast fashion. It’s all a kind of attempt at discerning some kind of future. How do we care for a future sky with the clothes we make and wear now?

Loosely modeled after Chinese dragon robes, which were popularized among emperors and dynastic officials during the Tang Dynasty, “Two Can Share Heaven” explores notions of togetherness and cooperation. Unlike traditional garments, the artist designed the piece to be worn by two people as “a simple but direct challenge to the notion of a single ruler blessed by gods,” they share. “Here, power must be shared, redistributed, and negotiated between two.”

The Museum of Arts and Design (MAD) has awarded Lin the 2025 Burke Prize, a prestigious grant given to an artist under the age of 45 working in the U.S. whose practice revolves around contemporary craft. If you’re in New York, see Lin’s work at MAD from February 28 to October 11. The artist is also currently working toward a solo exhibition at the Knoxville Museum of Art. Follow updates on Instagram.

A kite artwork by Hai-Wen Lin flies in the sky.
“October 3rd 6:58-7:56am Oak Street Beach, I woke you up in the morning // I’m sorry” (2022), tannic acid-toned cyanotype on muslin, acrylic, bamboo, thread, gold chain, brass, ceramic, wind, time, sand, the first light of the day, a lapping lake, the sound of traffic, a breath expanding the solar plexus, and another, and another, 63 x 58 x 5 inches
Artist Hai-Wen Lin models a garment with cyanotype details.
The artist wearing “October 3rd 6:58-7:56am Oak Street Beach, I woke you up in the morning // I’m sorry” and “October 8th 2:56-3:56pm Wicker Park; a picnic together // we probably shouldn’t feed the sparrows”
A textile sculpture hangs in a white-wall gallery space.
“Cloud Collar” (2023), dyed silk, feathers, gold, beads, wood, string, hair extensions, one wish, 99 x 140 x 18 inches. Photo by Prairie
“Cloud Collar” (2023), dyed silk, feathers, gold, beads, wood, string, hair extensions, one wish, 99 x 140 x 18 inches. Modeled by taisha paggett
A detail of a textile sculpture hangs in a white-wall gallery space.
Detail of “Cloud Collar” (2023). Photo by Prairie
A kite artwork by Hai-Wen Lin flies in the sky.
“Sunday, April 2nd 5:13–7:31pm” (2023), cyanotype on silk and cotton, developed in lakewater, steeped in black tea, feathers, beads, thread, bells, wood, gold, enamel, crystals, copper, brass, ceramic, dirt, flowers, sunlight, sweat, sand, rust, dust, a shivering body, a burning sensation, a desire to be lost, 90 x 96 x 12 inches
A hand holds an artistic kite handle.
“wishwinder” (2022), enamel on copper, copper leaf, wood, and chain, 4 x 6.5 x .5 inches

Do stories and artists like this matter to you? Become a Colossal Member today and support independent arts publishing for as little as $7 per month. The article Ethereal Kites by Hai-Wen Lin Transform into Elegant Garments and Sculptures appeared first on Colossal.

  •  

A Wooden Canopy by Kengo Kuma Casts Dappled Light Around a Copenhagen Museum

A Wooden Canopy by Kengo Kuma Casts Dappled Light Around a Copenhagen Museum

At Copenhagen Contemporary, Kengo Kuma and his team have honed in on the Japanese concept of komorebi, which reflects the unique interplay of light and shadow that occurs when the sun filters through the trees. The monumental, site-specific installation “Earth / Tree” harnesses this fleeting condition through a suspended canopy of wooden slats.

Curved with a central opening, the diaphonous structure floats above a brick platform and a pile of rubble. These two organic materials bridge Nordic and Japanese cultures, which both value craftsmanship and continuity with the landscape.

light streams through a wooden canopy in a large scale installation of wood and brick by Kengo Kuma

Kuma—who was recently awarded the bid to design the new National Gallery in London—often focuses on “soft architecture,” a mode of working entwined with the environment and people who engage with the space. “Earth / Tree” translates this concept into the Danish museum, where it’s on view through February 21, 2027.

light streams through a wooden canopy in a large scale installation of wood and brick by Kengo Kuma
visitors enjoy an installation in which light streams through a wooden canopy by Kengo Kuma
light streams through a wooden canopy in a large scale installation of wood and brick by Kengo Kuma
visitors work at a table and enjoy an installation in which light streams through a wooden canopy by Kengo Kuma
light streams through a wooden canopy in a large scale installation of wood and brick by Kengo Kuma

Do stories and artists like this matter to you? Become a Colossal Member today and support independent arts publishing for as little as $7 per month. The article A Wooden Canopy by Kengo Kuma Casts Dappled Light Around a Copenhagen Museum appeared first on Colossal.

  •  

How to Choose a Web Design Company That Understands Your Customers


The right web design company can optimize your website for higher conversions. But who knows your customers better? You, or the design team you plan to hire? Because businesses and their customers have industry- and niche-specific needs, it’s critical that your web design company understands your business.

Great design happens when your customer knowledge meets designer expertise. But that isn’t enough anymore. You will also need search engine optimization (SEO) and conversion rate optimization (CRO).

Ruler Analytics reported in 2025 an average conversion rate of just 2.9% across fourteen industries. This means there is massive optimization potential.

Source: Ruler Analytics

With search traffic declining and zero-click searches becoming the norm, isn’t it time you optimized your website for conversions? This is where the right web design company comes in.

Choosing the Best Fit in Web Design Specialists

Choosing which web design company to hire is more complex than ever, as skill sets vary among developers. So, start with your business goals.

Do you only need a website or does it need to integrate with internal or third party systems, your CRM, or dashboards? Will you be integrating existing processes or is developing them part of this project’s roadmap?

Most web designers are not developers capable of building complex systems. Many do not even have experience integrating existing systems. There is also a difference between UX/UI designers and UX/UI developers. You need both, but you may not need AI UI/UX design or development.

Plan First: Would Your Site Benefit from AI UI/UX?

What is your vision for the totality of how your website interacts with existing processes?

Most businesses think in terms of individual needs:

  • CRM
  • Calendar/appointment setting
  • Call tracking
  • Inventory management
  • Accounting
  • Project management
  • Analytics

These individual needs vary by type of business. If there is a business case for it and you have the funding, integrating everything into an all-encompassing solution may be preferable.

But how do you know what to build? Take the advice of Marc Caposino, founder of the AI Design Agency Fuselab Creative:

“The best user research happens in the wild. Watch how people currently solve the problem you’re addressing. What workarounds have they created? Where do they get frustrated? What do they do immediately after they complete the task?”

If you want to go beyond just having a website built, find an agency that has demonstrated success with similar projects.

Review Portfolios of Web Designs for Businesses Like Yours

Your business may seem simple to you because it is what you know. However, for many niches, that simply isn’t accurate. Stick to designers who specialize in your industry.

Most designers will have a page showing a portfolio that allows you to click through to live websites. Study their layouts and make notes about what you like and dislike.

When you’re searching for web designs, choose sites for businesses in your niche that are most similar to your own. For example, if you own a dental practice, search for “dental website design”. You may even want to look for differences between a site for a pediatric dentist versus an oral surgeon.

Some designers make that easier. For example, this dental web design portfolio uses filter tabs at the top to make navigation of their design portfolio intuitive and efficient.

Interview Niche-Specific Web Developers

Do not expect every web development company to be familiar with the requirements of your business. It is up to you to make sure they are qualified.

That is why I recommend you work with a company with experience in your industry. Here’s an example.

Dentistry doesn’t seem complicated. Everyone knows a dentist. But every dental practice offers different procedures. Not all do implants or offer Invisalign. Within dentistry, there are also specialties, such as orthodontists, pediatric dentists, oral surgeons, periodontists, and others.

While they all have a primary goal of scheduling patient appointments, some use a simple appointment form while others integrate with dental management software such as Dentrix and Oryx. Inquire whether the company you plan to hire is familiar with integrating any industry-specific applications your business uses.

Focus on Your Business Goals

Make a list of every application essential to your business. Determine which applications the developer you hire will need to incorporate into your website.

Include your:

  • CRM
  • Office management
  • Accounting package
  • Appointment booking
  • Advertising
  • Dashboards
  • Call tracking and analytics platforms

Failure to plan could mean delays and increased costs if you have to hire additional specialists or programmers to complete your project.

How to Know What Customers Want in Website Design

Use behavioral analytics tools to analyze how visitors to your site use it. There are many paid options, as well as the free option Microsoft Clarity. This video explains how this type of tool works and the pros and cons of HotJar versus Microsoft Clarity.

Now that you can do this at no cost, why wouldn’t you? Analytics tools can answer questions such as:

  • Are visitors clicking in the wrong place?
  • How often do they land on a page and immediately exit?
  • Did they leave your appointment scheduling option without completing it?

The answers to these questions can be indicators that your design needs improvement.

Ideally, your business should be willing to accommodate whatever your potential customers want in terms of how booking and other processes work.

I’ve had younger clients who only wanted customers to book their own appointments, yet they were running ads targeting an older, more prosperous demographic–then becoming unhappy that it was making their phone ring!

Involve an SEO Expert Before You Move an Existing Site

Over the decades, I’ve seen many sad stories of businesses losing traffic and incoming links because they launched a new website without 301 redirects of the existing URLs.

Any time you do a website redesign, an SEO expert should be involved. This is essential to avoid technical mistakes, slow load times, poor mobile responsiveness, or bad UX. If the development company will be handling the technical SEO of your site, ask for references specific to their SEO capabilities.

Test Your Website Before Launching

When you’re negotiating the contract for your website, make sure testing is included. A final testing process that catches problems before launch is essential. Even if the development company is doing this testing, repeat it in-house as well. Have someone with strong attention to detail read every page and test every link, form, and integration.

If you use third-party solutions, verify that those work and are optimally configured. For example, appointment setting apps may have two to three steps or as many as 14! Every additional step can reduce conversions. If one-click checkout works best for Amazon, why would anyone think asking 14 questions is a good idea?

Reassess what information you’re asking potential customers for. Call in a few favors and observe others go through the process of buying or booking on your website. Any confusion will cause abandonment, so watch for any hurdles that slow the process.

With search traffic declining, it's crucial to make the most of every visitor to your site by increasing conversions. To do this, you’ll need to streamline appointment scheduling and checkout processes to ensure as little friction as possible.

Remember that your website is an extension of your brand’s reputation. To make a great impression on visitors, you’ll want to make sure everything works perfectly.

  •  

Joe Macken Spent 21 Years Hand-Assembling a Vast Model of New York City

Joe Macken Spent 21 Years Hand-Assembling a Vast Model of New York City

Over the course of two decades, Queens resident Joe Macken meticulously built an entire city from the ground up. In fact, he built New York City—the whole thing—one building, house, and bridge at a time. Now, his expansive scale construction is on view in He Built This City: Joe Macken’s Model at the Museum of the City of New York.

Macken began working on the 50-by-27-foot model in 2004, first in Middle Village, Queens, before moving to Clifton Park, New York. It comprises 340 individual sections, each built from everyday materials like cardboard and glue, with many of the buildings constructed of balsa wood and detailed with pencil and paint. He completed the structure in 2025, and it’s now on long-term view at the museum, where visitors can walk around it and are encouraged to use binoculars to find familiar buildings and neighborhoods.

a detail of a cityscape and an expansive, hand-built scale model of New York City
Photo by David Lurvey. All images courtesy of the artist and the Museum of the City of New York, shared with permission

You may also enjoy the “Panorama of the City of New York” at the Queens Museum, which was completed in 1964 and took a team of more than 100 people about three years to complete.

visitors to the Museum of New York look over an expansive handmade model of the city
Photo by Filip Wolak
a detail of an expansive, hand-built scale model of New York City
Photo by David Lurvey
a detail of a steam ship in an expansive, hand-built scale model of New York City
Photo by David Lurvey
A young visitor to the Museum of New York looks over an expansive handmade model of the city
Photo by Filip Wolak
a detail of a steam ship and an expansive, hand-built scale model of New York City
Photo by David Lurvey
a detail of a steam ship and an expansive, hand-built scale model of New York City
Photo by David Lurvey
a detail of a steam ship and an expansive, hand-built scale model of New York City
Photo by David Lurvey
a detail of a steam ship and an expansive, hand-built scale model of New York City
Photo by David Lurvey

Do stories and artists like this matter to you? Become a Colossal Member today and support independent arts publishing for as little as $7 per month. The article Joe Macken Spent 21 Years Hand-Assembling a Vast Model of New York City appeared first on Colossal.

  •  

Starling Construction Expands Bathroom Remodeling Services for Central Indiana Homeowners

FRANKFORT, Ind. — Starling Construction LLC is promoting its bathroom remodeling services for Central Indiana homeowners who want cleaner layouts, updated finishes, improved storage, better lighting, and more functional daily-use spaces.

The company’s bathroom remodeling service is designed for homeowners dealing with older bathrooms, worn-out fixtures, limited storage, poor lighting, outdated tile, and layouts that no longer support the way the space is used. Starling Construction handles full bathroom remodels, new tile, updated vanities, improved lighting, better storage, and layout changes that make bathrooms easier to move through, easier to clean, and better suited for everyday routines.

Starling Construction’s bathroom remodeling process begins with a discussion of the homeowner’s vision, needs, priorities, budget, and existing space. The company then provides a straightforward quote and plan, including a clear scope of work, transparent pricing, and a practical timeline. During construction, the team focuses on craftsmanship, protecting surrounding areas, and leaving the finished bathroom clean and ready to use.

Bathroom remodeling remains an important part of the broader home-improvement market as homeowners continue investing in existing properties. The Joint Center for Housing Studies of Harvard University reports that its Remodeling Futures Program has studied home maintenance and improvement trends for more than three decades, and that the United States spends more than $600 billion annually on home maintenance and improvement. That spending reflects the ongoing need for repairs, upgrades, and functional improvements in homes of different ages and sizes.

“Bathrooms are some of the most-used rooms in a home, so small problems can become daily frustrations,” said a representative of Starling Construction. “Our goal is to help homeowners create bathrooms that are practical, comfortable, durable, and finished with care.”

Starling Construction emphasizes clean, functional layouts as a key benefit of a well-planned bathroom remodel. In many older bathrooms, limited floor space, poor fixture placement, inadequate lighting, and insufficient storage can make the room feel cramped or difficult to use. By improving flow, storage, lighting, and finish quality, the company helps homeowners create bathrooms that better support morning and evening routines, guest use, and long-term household needs.

The company also focuses on durable materials installed correctly. Bathroom spaces are exposed to moisture, frequent cleaning, daily foot traffic, and repeated use of plumbing fixtures, cabinetry, tile, and lighting. Proper installation is important for long-term performance, especially when projects include tile work, vanities, shower areas, flooring, fixtures, and lighting updates. Starling Construction’s service page emphasizes durable products, clean finishes, and workmanship that respects the homeowner’s time and property.

Bathroom updates can also support safety, comfort, and aging-in-place goals. AARP’s HomeFit guidance recommends bathroom improvements such as securely installed grab bars, nonslip bath mats, automatic night-lights, and other practical features that can make daily use safer and more comfortable. Its guide notes that grab bars should be securely installed to a solid wall surface rather than relying on towel bars or suction-cup grab bars, reinforcing the importance of thoughtful planning and proper installation in bathrooms.

Starling Construction serves homeowners who want to remodel without unnecessary confusion or pressure. The company’s bathroom remodeling page states that many projects can keep the existing layout while upgrading fixtures, tile, storage, and materials. For homeowners who need better flow or more space, the team can also help redesign the layout. If unexpected issues, such as hidden leaks or water damage, are uncovered, Starling Construction reviews the issue with the homeowner and provides options before proceeding.

The company’s approach is especially useful for homeowners who want a remodel that balances appearance and daily function. Updated tile, improved lighting, better storage, refreshed vanities, modern fixtures, and clean finishes can make the bathroom easier to use while also improving the overall feel of the home. For families, guests, and homeowners planning to stay in place, a well-built bathroom remodel can make a meaningful difference in daily comfort.

Customers who want to learn more can visit Starling Construction’s bathroom remodeling services in Central Indiana page for service details, process information, frequently asked questions, and quote options.

Starling Construction LLC is located at 1851 Washington Drive, Frankfort, IN 46041, by appointment only. The company can be reached by phone at (765) 237-9420 or by email at office@starlingconstruction-llc.com.

About Starling Construction LLC

Starling Construction LLC provides remodeling and home-improvement services across Central Indiana. The company’s services include bathroom remodeling, kitchen remodeling, full-home remodeling, basement remodeling, home additions, garage additions, outdoor living projects, interior painting, shower and bath conversions, tile and flooring, custom cabinetry, small projects, handyman work, door and window installation or replacement, commercial remodeling, and aging-in-place remodeling. Starling Construction focuses on clear communication, straightforward planning, steady workmanship, and results built to last.

Media Contact

Starling Construction LLC
1851 Washington Drive
Frankfort, IN 46041
Phone: (765) 237-9420
Email: office@starlingconstruction-llc.com

The post Starling Construction Expands Bathroom Remodeling Services for Central Indiana Homeowners appeared first on Social Lifestyle Magazine.

  •  

The Secret to Organizing a Junk Drawer (Hint: Stop Treating It Like One)

kitchen drawer storage ideas

My biggest issue with the term junk drawer is the word junk. If something truly has no purpose, why are we storing it in valuable space in our kitchen, mudroom, or office? Now don’t get me wrong—I’m not saying everything in your junk drawer needs to be high quality or particularly valuable. What it does need to do, however, is serve a purpose.

When organizing any space in your home—from your fridge to your closet—every item should earn its keep. If you don’t wear those black pumps, donate them. If you keep buying that bag of spinach but never finish it, it might be time to re-evaluate. The items in your junk drawer should follow the same rule.

Once you stop thinking of it as a catch-all space and start thinking of it as a utility drawer with a purpose, it becomes much easier to keep organized. Below is my step-by-step system for organizing a junk drawer so it actually stays that way.

Rachel Rosenthal

Rachel Rosenthal is an organizing expert and founder of Rachel and Company, a Washington, DC-based professional organizing firm. Since 2007, Rachel’s firm has worked with 3000+ clients and teamed up with prominent brands, including West Elm, Pottery Barn, The Container Store, and Four Seasons. Rachel’s expertise has been featured in 100+ publications, including Real Simple, Martha Stewart, House Beautiful, The Rachael Ray Show, and local NBC, ABC, and Fox morning shows. Rooted in the belief that organization can be achieved by all, Rachel emphasizes solutions that are easy to use and enhance a home’s existing aesthetic.

How to Organize a Junk Drawer (Quick Steps)

If you want the quick version, here’s the simple system I use:

  1. Empty the drawer completely
  2. Declutter broken or unused items
  3. Relocate items that belong elsewhere
  4. Create categories for what remains
  5. Add drawer organizers or dividers
  6. Return items thoughtfully—and prep them for use

Now let’s break down each step.

organized kitchen drawers coffee nook

Why Junk Drawers Get Out of Control

The biggest problem with a junk drawer is the catch-all mentality. We’ve been conditioned to toss items we don’t know what to do with into one drawer and deal with them later. That’s how you end up with drawers bursting at the seams and never being able to find the battery you know you have, or the matchbook you need when the power goes out.

Just like every other space in your home, your junk drawer should contain intentional categories. When every item has a place, the drawer becomes useful instead of chaotic. Changing your mindset from “junk drawer” to a drawer that holds categorized items with purpose is the first step in organizing it.

Step-by-Step Guide to Organizing a Junk Drawer

Step 1: Empty the Junk Drawer Completely

Yes, everything. I know the thought of it can make most of us wince, but the first step to organizing your junk drawer is to dump it all out. It’s the only way to see exactly what you’re working with. Once the drawer is empty, wipe it down so you’re starting with a clean slate.

Step 2: Declutter and Remove Broken Items

Next, declutter the items you pulled out of the drawer. Some things will be obvious—like tossing trash or recycling old receipts. But don’t stop there. Write with each pen to make sure it works. Test batteries. Turn on flashlights. Check tape rolls. You might be surprised how many items in a junk drawer are actually broken or unusable. Think through which items you truly need in your home and which ones can be discarded or donated.

Step 3: Relocate Items That Belong Elsewhere

After decluttering, look at what remains and decide whether it actually belongs in this drawer.

For example:

  • Does your screwdriver need to live in the kitchen, or should it go in the garage or toolbox?
  • Is that ruler better suited for the kids’ homework area?
  • Should extra charging cables live in an office drawer instead?

Relocating items helps prevent your junk drawer from becoming a storage space for things that belong elsewhere.

Step 4: Create Categories for What’s Left

Once you’ve decluttered and relocated items, you’ll be left with the things that truly belong in the drawer. Now it’s time to create categories.

For example:

  • Scissors
  • Tape
  • Batteries
  • Pens and pencils
  • Rubber bands
  • Small tools
  • Chargers

Grouping items into categories makes it much easier to find what you need—and maintain the system over time.

Step 5: Add Drawer Organizers or Dividers

Once you’ve identified your categories, measure your drawer so you can add organizers that fit. Some type of bins or drawer dividers is essential for junk drawer organization. Because these drawers often contain multiple categories, organizers prevent everything from sliding together into one big pile.

Measure the width, depth, and height of the drawer, then find organizers that fit your space and categories. Adjustable dividers, small bins, or modular trays all work well. Think of it like playing a little Tetris until everything fits perfectly.

Step 6: Put Everything Back (and Prep It for Use)

Now comes the satisfying part—putting everything back. Place each category into its designated organizer or section. But before you close the drawer, take it one step further.

This step will be unique to your junk drawer, but consider sharpening pencils, folding the end of the tape over so it’s easy to grab, refilling a lighter, or pairing batteries by size. These small finishing touches make a big difference. Now everything in your junk drawer is ready to be used at a moment’s notice.

junk drawer kitchen storage

What Should Actually Go in a Junk Drawer?

A well-organized junk drawer typically holds small, frequently used household items that don’t have another obvious home.

Some common items include:

  • Batteries
  • Scissors
  • Tape
  • Rubber bands
  • Pens and pencils
  • Flashlight
  • Matches or lighters
  • Phone chargers
  • Small tools like a screwdriver

The key is that every item serves a purpose and belongs to a category within the drawer.

Common Junk Drawer Organization Mistakes

If your junk drawer never seems to stay organized, one of these habits might be the reason.

Treating it like a catch-all.
A junk drawer should not be where random items go to disappear.

Keeping broken items.
Dead batteries, dried-out pens, and tangled cords create clutter quickly.

Not using drawer dividers.
Without organizers, everything slides into one chaotic pile.

Mixing too many categories.
Limiting the drawer to a few simple categories helps keep it functional.

Never editing the drawer.
A quick reset every few months keeps clutter from building up again.

modern kitchen drawer storage

How to Keep Your Junk Drawer Organized

Once your drawer is organized, a little maintenance will go a long way toward keeping it that way. A quick five-minute reset once a month can help prevent clutter from building up—use that time to toss broken items, test pens, or remove anything that’s found its way into the drawer without a real purpose. Try to return items to their designated sections after using them so categories stay intact, and be mindful about what you add back in. If something doesn’t serve a clear purpose, it likely doesn’t need to live there.

A junk drawer doesn’t need to be perfect, but with a simple system in place, it can stay functional, tidy, and easy to use.

Organize Your Junk Drawer With the Help of These Hard-Working Products

Once your drawer is decluttered and categorized, the right organizers make all the difference. Drawer dividers, small bins, and modular trays keep items from shifting around and turning back into one big pile.

The right tools help ensure that every item in your drawer has a home—and stays there.

The post The Secret to Organizing a Junk Drawer (Hint: Stop Treating It Like One) appeared first on Camille Styles.

  •  

Designing the Outdoor Kitchen at Zuma Beach House

Zuma Beach House Outdoor Kitchen2

As I write this, my “Beach House” Pinterest board has exactly 1,323 images saved to 44 different sections. There’s a whole folder just for “kitchen hardware.” Another one called “vibes???” that is exactly what it sounds like. Six years of planning and permitting for our beach house renovation gives you a LOT of time to make decisions—and then re-make those decisions as you discover new ideas and your taste inevitably evolves.

But for all that obsessive research, there was one area where my board came up pretty empty: the outdoor kitchen.

I knew what I saw when I imagined it—an organic, earthy space where you’d flow between the prep area, the grill, and the pizza oven. Where the materials told a story: teak weathered by salt air, terracotta tile that looked like it had been there for decades, stucco walls that connected the whole thing to the landscape. Where the inspiration was equal parts Mallorcan kitchen and a long weekend in Oaxaca.

What my research kept turning up? The complete opposite of that. So many outdoor kitchens that looked like a carbon copy of the last one: stainless steel appliances, polished concrete, and brick that was just a little too perfect. Many of them were pretty, but styled within an inch of their lives (in a way that made you feel like the grill had never been turned on).

SO… Adam and I did what we always do when designing a space. We turned to our camera roll to start drawing from inspiration photos we’d taken on our travels.

Outdoor Kitchen Inspiration

Our Visual References

We scrolled through years of iPhone pictures from trips. There were meals eaten at long wooden tables in dusty courtyards, kitchens tiled in patterns we’d photographed through restaurant windows, and pizza ovens glowing orange at dusk. We sketched layouts on napkins. We pulled together a reference folder that was half travel diary, half mood board, and handed it to our landscape architect, Michael Fioré, who got it immediately.

What’s taking shape is a space that doesn’t look like anything I’ve seen before (which is always the goal).

So What Are We Actually Building?

The outdoor kitchen will have three main structures working together: a full countertop workspace housing our grill, a separate station for the pizza oven, and a center bar-height teak table that pulls the whole space together. That table is doing a lot of work in this design. It’s the gathering spot, the extra prep surface, the build-your-own-pizza station during parties, and honestly, probably where everyone will end up sitting with a glass of wine while Adam grills.

One of my favorite details that you can see in the renderings: the Clay Imports terracotta brick underfoot, laid in a herringbone pattern that gives the whole space that warm, sun-baked feel. There’s nothing like terracotta to make a space feel lived-in and loved from day one.

The kitchen will also connect directly to the interior kitchen through a huge window with sliding glass panes, which means there will be an outdoor countertop acting as a pass-through. I keep picturing serving platters being passed through the window, or just posting up on a barstool there with a drink while the pizza comes out of the oven. The line between inside and outside is going to be beautifully, intentionally blurry.

The Grill We Chose (And Why)

We’re installing a Zwilling Flammkraft Grill, and I will just come out and say that it’s undoubtedly the prettiest grill I’ve ever seen. German-engineered, infrared technology, individual cooking and heating zones—which is genuinely key when you’re trying to grill a whole meal at once. (Basically what we do every single weekend.) The built-in gas grill will be fully integrated into the countertop design so it looks truly custom. Which, if you’ve been following along, you know is exactly the vibe we’re going for.

The Tile That Started It All

When we were in Mexico a couple of years ago, I took a photo of this small restaurant kitchen that had terracotta tiles running across the countertop and up the backsplash. It was one of those moments where I just stood there absorbing every detail so I wouldn’t forget it. I’ve referenced that photo more times than I can count while planning this space.

So for the backsplash behind the grill, we’re working with our friends at Clay Imports to use their terracotta antique matte 2.5×8 tiles. They have this gorgeous warmth and slight texture that you can see even in the renderings—catching the light differently throughout the day, making the whole wall feel handmade in the best possible way. It’s the element I think will give the kitchen its true signature look.

Zuma Beach House Outdoor Kitchen2

The Pizza Oven Situation

Okay, THIS is the part I’ve been dreaming about since we first started talking about this house. We ordered a DIY kit from Forno Piombo to build a large, custom wood-fired pizza oven—big enough to cook 3 or 4 pizzas simultaneously. (Read: actual pizza parties are happening.) We’ll install it onto the countertop and build up a dome with a smooth stucco cover for that rustic, Italian farmhouse look. You can already see it in the renderings—that glowing arch, just sitting there looking like it belongs in the Italian countryside.

The Detail That Will Make Everything

In the center of the space, we’re planting one large ornamental olive tree. This is the thing I will look at every morning from the kitchen window. Just an ancient, gnarled, perfect olive tree in the middle of a Mediterranean garden, with lavender drifting around the edges and terracotta pots of herbs and small citrus trees scattered throughout, so I can literally grab a handful of rosemary or squeeze a lemon straight from the tree while I’m cooking.

Looking at these renderings, the table set under that canopy of branches, the bowl of lemons sitting out, the lavender in full bloom in the foreground—it already feels like the space I’ve been trying to find on Pinterest for six years. Turns out it didn’t exist yet, so we’re making it.

Construction’s moving quickly, and we’re planning for a June completion. Which means we’ve got some major outdoor cooking ahead this summer! More soon.

The post Designing the Outdoor Kitchen at Zuma Beach House appeared first on Camille Styles.

  •  

Dozens of Suspended ‘Halos’ Glimmer in a Florentine Factory

Dozens of Suspended ‘Halos’ Glimmer in a Florentine Factory

Earlier this month, dozens of metallic discs suspended from the ceiling of a large industrial space invited viewers to immerse themselves in what SpY describes as “a continuous choreography of movement and reflection.” The artist is known for his large-scale installations, often repurposing objects like traffic cones and metallic rescue blankets to create striking urban interventions.

SpY’s most recent room-scale work, titled “Halos,” reimagined the industrial interior of a former railway-related factory in Florence—a place we typically associate with Renaissance elegance as opposed to brutalist design—as part of the city’s Bright Festival.

A large interior installation of metallic discs hanging from the ceiling in an industrial space

Three stories high, “Halos” interacts with the natural breeze that flows throughout the space, which is exacerbated by people moving around. Glimmering light further lends a sense of ethereality and even magic.

See more on Instagram.

A large interior installation of metallic discs hanging from the ceiling in an industrial space
A detail of a large interior installation of metallic discs hanging from the ceiling
A large interior installation of metallic discs hanging from the ceiling in an industrial space

Do stories and artists like this matter to you? Become a Colossal Member today and support independent arts publishing for as little as $7 per month. The article Dozens of Suspended ‘Halos’ Glimmer in a Florentine Factory appeared first on Colossal.

  •  

Bubbles, Algae, and Plastics Go Haute Couture in ‘Iris van Herpen: Sculpting the Senses’

Bubbles, Algae, and Plastics Go Haute Couture in ‘Iris van Herpen: Sculpting the Senses’

Riding the coattails—or perhaps it would be more apt to say the gown trails—of the monumental retrospective exhibition in 2023 in Paris at the Musée des Arts Décoratifs, the Brooklyn Museum is about to open the striking new edition of Iris van Herpen: Sculpting the Senses. Building upon the previous presentation’s emphasis on the way fashion meets art, this show also includes recent collections like Sympoeisis, reaffirming Iris van Herpen’s one-of-a-kind approach to sustainable, sculptural couture.

Van Herpen is known for her elaborate dresses that incorporate high-tech processes and materials, such as laser-cutting and Plexiglas, while also embracing the rhythms and patterns of biological and celestial realms. At this year’s Met Gala, for example, Olympic skier Eileen Gu arrived in a dress titled “Airu,” which was not only coated in plastic bubbles but also emitted real ones. In the “Living Algae” look from her 2025 Sympoeisis collection, van Herpen even incorporates real Pyrocystis lunula, a type of algae that forms a crescent shape and glows in the dark.

a model wears a blue, sculptural, high-tech dress by Iris Van Herpen
“Living Algae” look from the ‘Sympoiesis’ collection (2025), Pyrocystis lunula algae, nutrient gel, H2O, silicone, silk organza, and tulle. Collaborator: Chris Bellamy. Model: Stella Maxwell. Photo by Molly SJ Lowe

“Fascinated by the complexity of nature and the power of science, van Herpen transforms scientific concepts into visionary fashion,” says a statement. “Drawing from wide-ranging fields spanning mathematics, neuroscience, marine biology, paleontology, mycology, mineralogy, astronomy, and more, her haute couture designs seamlessly merge art, science, and technology—evoking the often unseen structures of nature, from coral reefs and branching systems of fungi to the vast patterns of planetary motion.”

Sculpting the Senses features more than 140 haute couture designs, plus the works of numerous artists like Kenny Nguyen, Wim Delvoye, Agostino Arrivabene, 目[Mé], Katsumata Chieko, Tara Donovan, and many others—several of whom have pieces in the Brooklyn Museum’s own collection. The experience is also complemented by a multi-sensory soundscape created by Dutch composer and music producer Salvador Breed.

The show opens on May 16 and continues through December 6 in Brooklyn. See more on van Herpen’s Instagram and YouTube.

a model wears a sculptural, high-tech dress by Iris Van Herpen
“Labyrinthine” dress from the ‘Sensory Seas’ collection (2020), glass organza, crepe, tulle, and Mylar, modeled by Cynthia Arrebola. Photo by David Ụzọchukwu
an installation view of a high-tech, elaborate dress on a mannequin in the exhibition 'Iris van Herpen: Sculpting the Senses,' in front of another artwork that looks like a wave frozen in space
Installation view of ‘Iris van Herpen: Sculpting the Senses,’ Brooklyn Museum, New York
a model wears a white, sculptural, high-tech dress by Iris Van Herpen
“Morphogenesis” dress from the ‘Sensory Seas’ collection (2020), laser-cut and screen-printed mesh, duchesse satin, and laser-cut Plexiglas, created in collaboration with Philip Beesley and modeled by Yue Han. Photo by David Ụzọchukwu
a model wears a white, sculptural, high-tech dress by Iris Van Herpen
“Loie” dress from the ‘Sympoiesis’ collection (2025), silk satin and resin, modeled by Akuol Deng Atem. Photo by Gio Staiano
an installation view of high-tech, elaborate dresses on mannequins in the exhibition 'Iris van Herpen: Sculpting the Senses'
Installation view of ‘Iris van Herpen: Sculpting the Senses,’ Brooklyn Museum, New York
a model wears a sculptural, high-tech dress by Iris Van Herpen
“Shift Souls” dress from the ‘Shift Souls’ collection (2019), laser-cut Komon Koubou textile, silk organza, and Mylar, modeled by Issa Lish. Photo © Sølve Sundsbø
an installation view of a high-tech, elaborate dress on a mannequin in the exhibition 'Iris van Herpen: Sculpting the Senses,' next to some other artworks
Installation view of ‘Iris van Herpen: Sculpting the Senses,’ Brooklyn Museum, New York

Do stories and artists like this matter to you? Become a Colossal Member today and support independent arts publishing for as little as $7 per month. The article Bubbles, Algae, and Plastics Go Haute Couture in ‘Iris van Herpen: Sculpting the Senses’ appeared first on Colossal.

  •  
❌