See how you can decorate Easter eggs in beautiful and unique designs with these 7 different methods. These colored eggs are easy for kids and adults alike to create! Why we love this project Decorating Easter eggs is a fun tradition for many, and it’s not just for kids! We’ve experimented with lots of different... Go To project
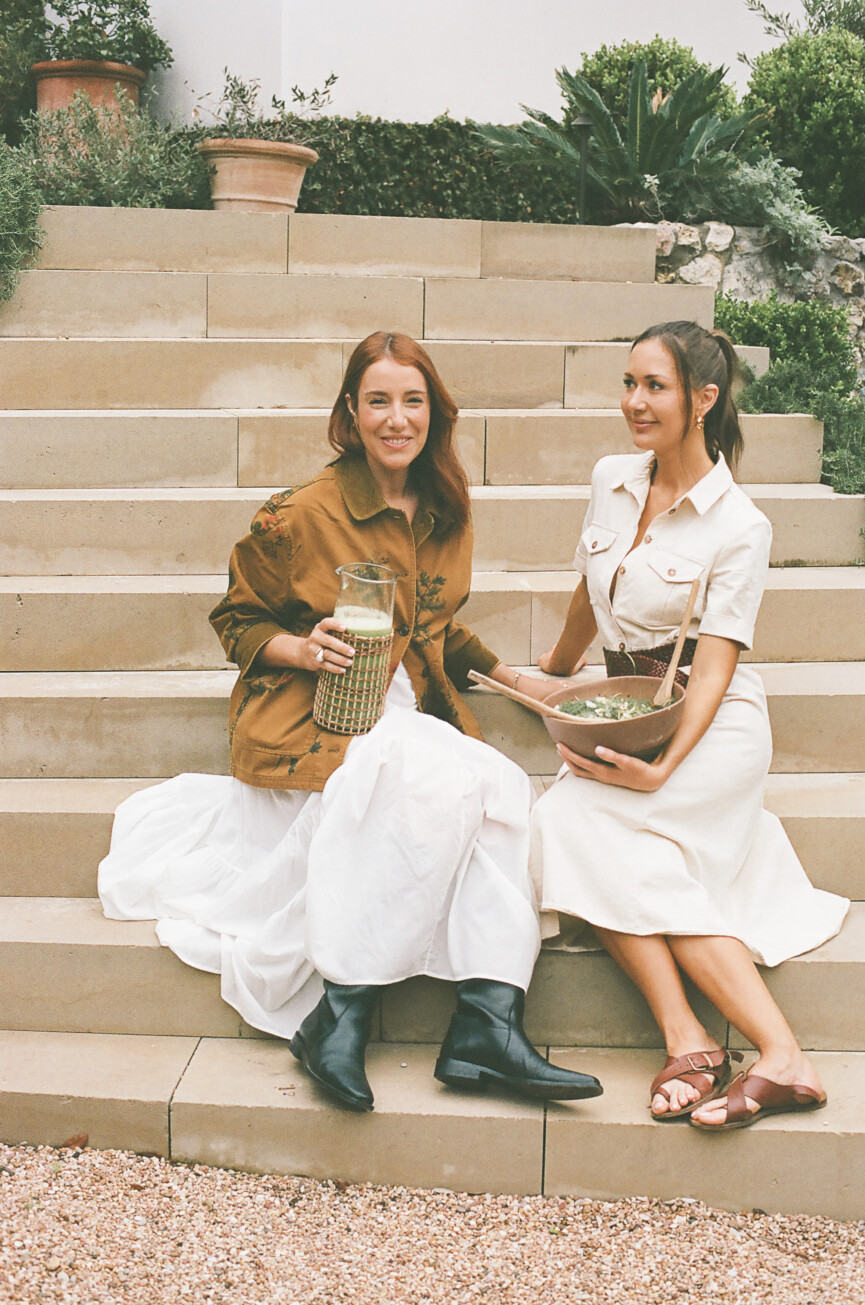
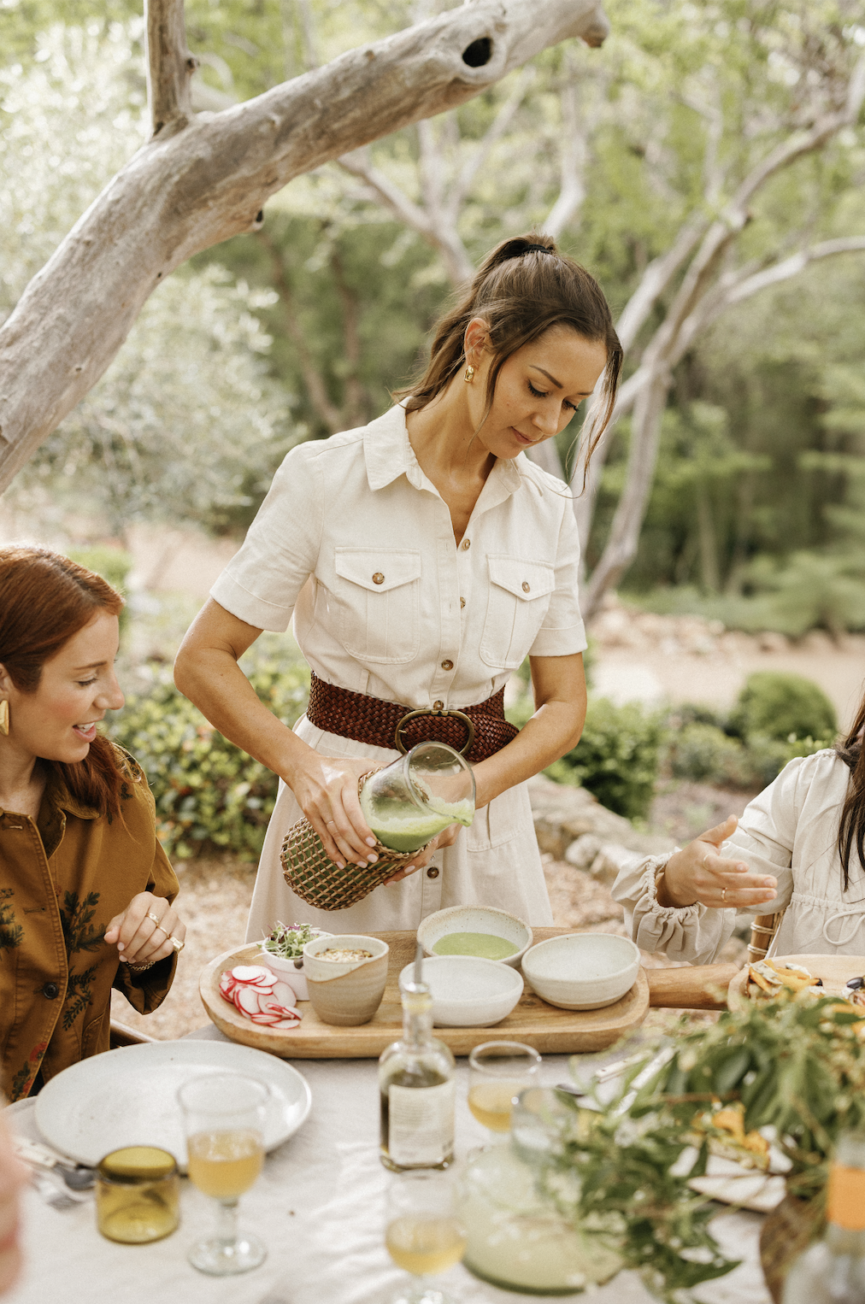
At first glance, Camilla Marcus is a study in contrasts. She takes her work seriously, yet brings a sense of playfulness to everything she does. She can pull off a dinner party for 100, but might not plan the menu until that morning, letting the farmers market be her guide. Her vegetable-forward cooking is deeply nourishing—and she’s never one to turn down a midday glass of wine.
But nothing about Camilla feels inconsistent. She’s so rooted in who she is that all of her layers come together as a beautifully aligned life—one that reflects the passionate approach she brings to her work as a regenerative chef, founder of west~bourne, and mother of four in Los Angeles.
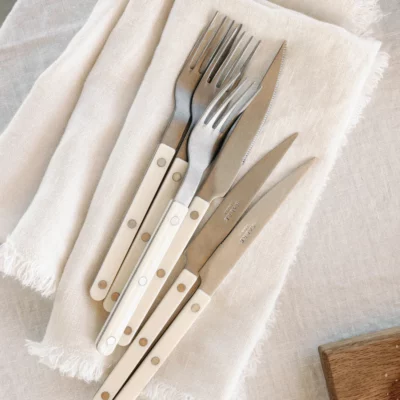
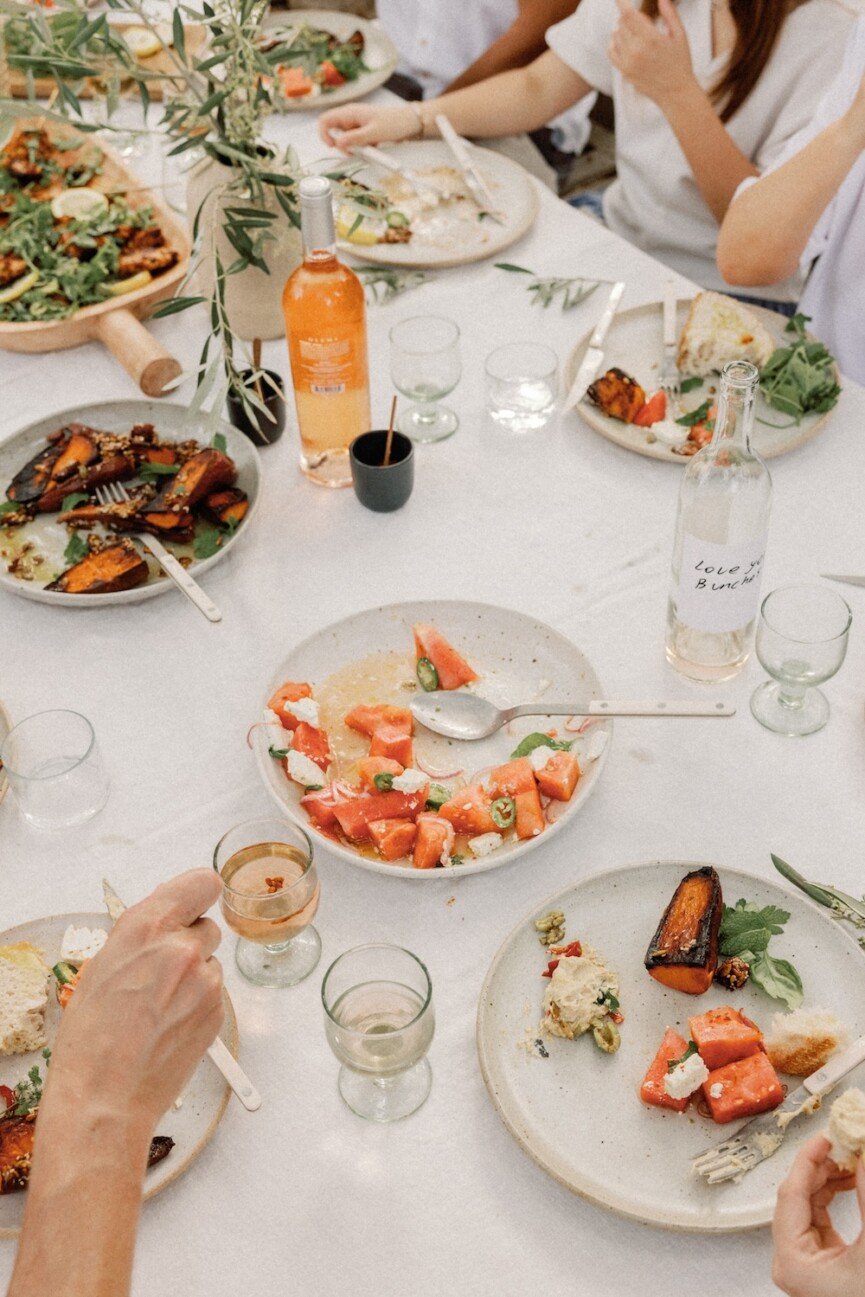
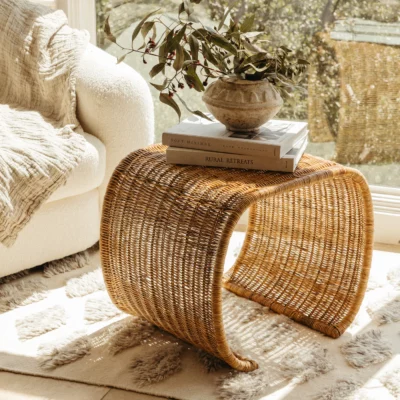
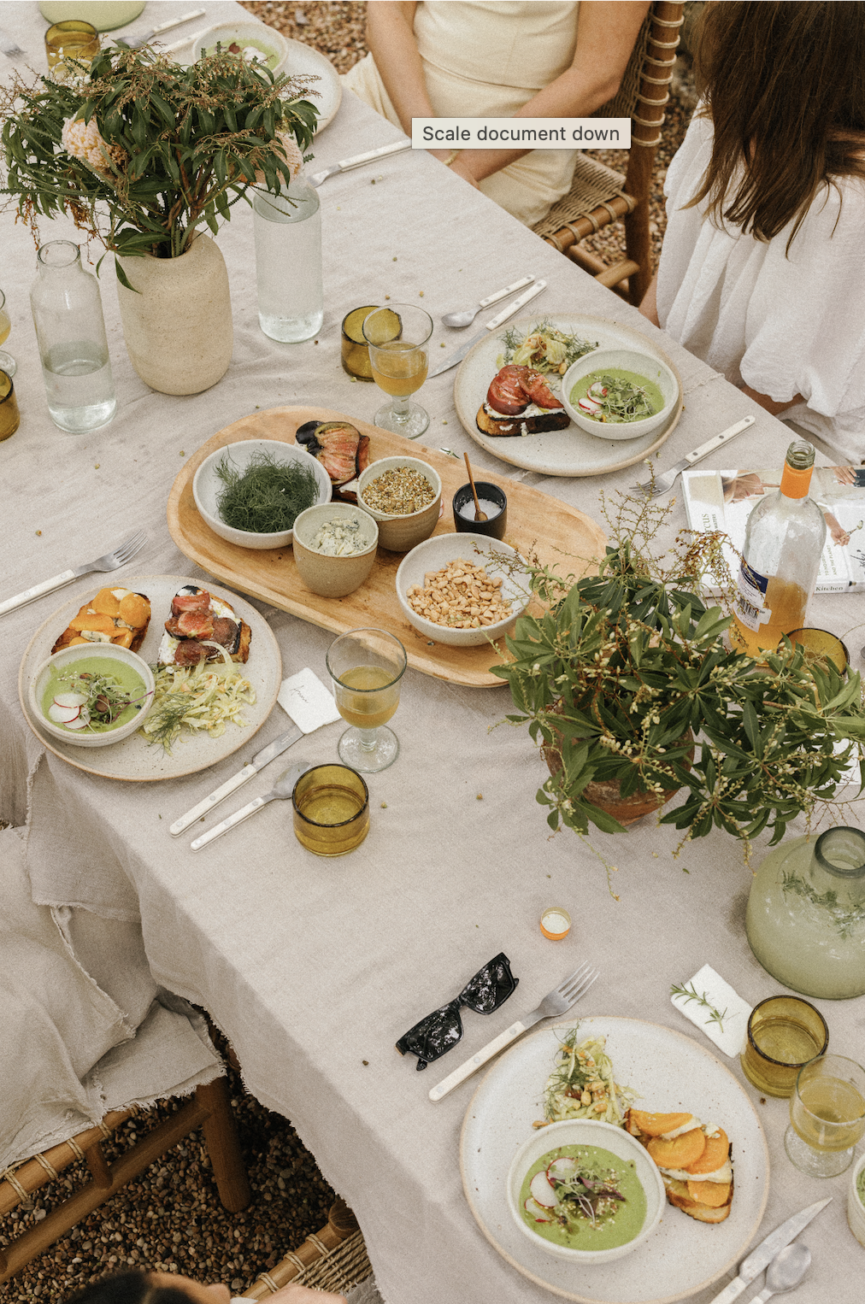
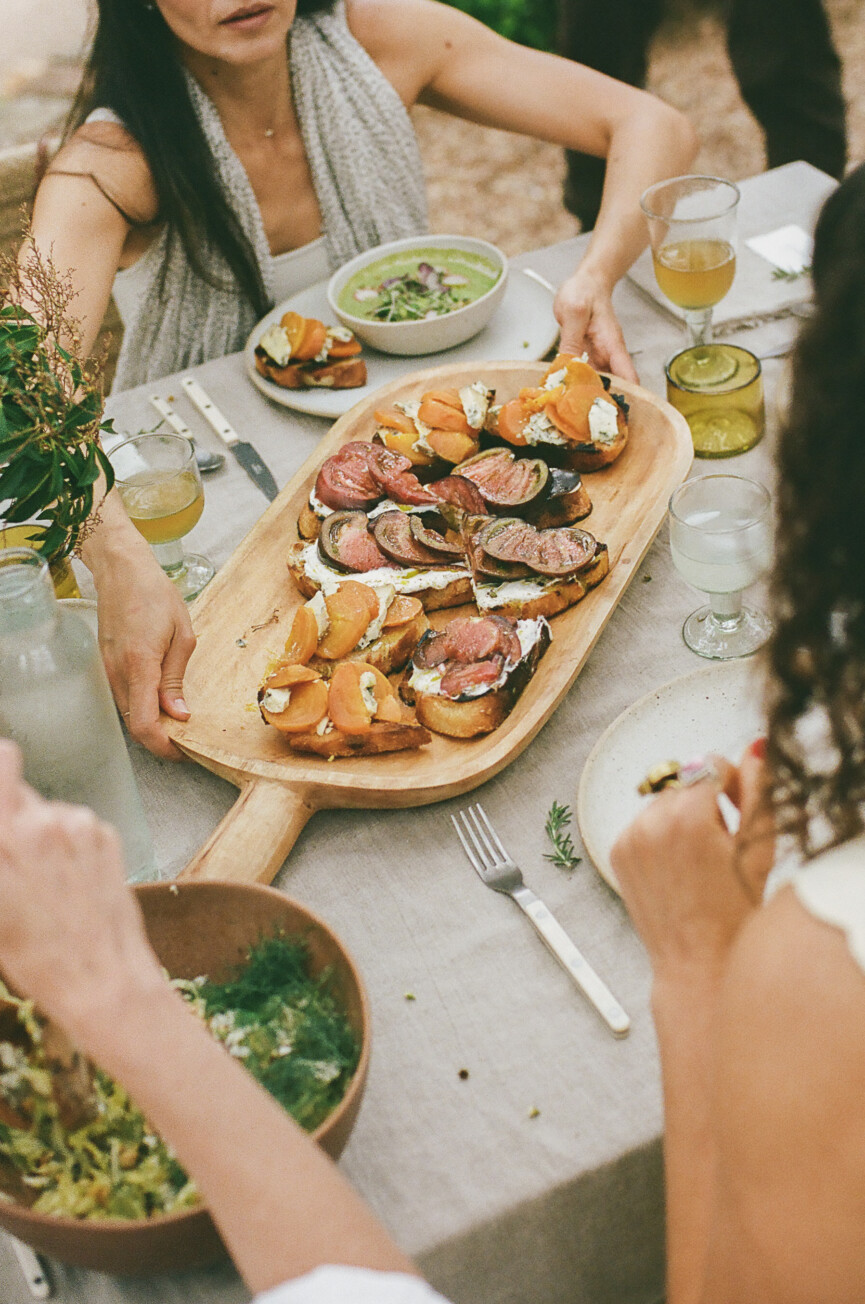
To celebrate the launch of her cookbook My Regenerative Kitchen, Camilla joined me for a backyard lunch under the trees with a few friends. We cooked vibrant, plant-based dishes from the book—tartines, a crunchy fennel salad, and the most stunning rose chocolate bark—poured natural wine, and soaked up her perspective on what it actually means to cook in a way that nurtures both our bodies and the earth.
Her philosophy, in her own words: “What’s good for our soil is always better for our health.”
What I love most about how Camilla thinks about food is the sense of liberation in it. She writes about improvisational cooking the way musicians talk about jazz—not knowing exactly where the notes will lead is the point. The farmers market becomes her guide, and “not being in control” becomes both liberating and inspiring rather than stressful. I left our lunch genuinely rethinking the relationship between spontaneity and nourishment.
Her book makes a compelling case that our everyday choices—the ingredients we buy, how we prep them, what we do with what’s left—are actually the most accessible entry points into climate action. Not through deprivation or a complete overhaul, but through small, cumulative shifts that start to feel natural over time.
Camilla Marcus’s Tips for a Zero-Waste Kitchen
Break up with paper towels. Keep a stack of washable kitchen towels within reach—you’ll be surprised how quickly you stop missing the paper.
Reimagine your pantry. Swap plastic wrap for beeswax alternatives. Use glass jars and metal tins for everything from flours to preserves.
Go reusable with storage. Stasher silicone bags replace Ziploc. Camilla also freezes stocks, sauces, and leftover wine in silicone molds for future meals.
Use the whole vegetable. No stalk left behind. Fennel fronds become garnish, stalks go into stock, and most produce doesn’t need peeling.
Rethink “scraps.” Before you toss it, ask: Can this add flavor to a broth or sauce? Onion peels, herb stems, cheese rinds—all fair game. Compost what you truly can’t cook.
Clean green. Look for nontoxic brands like Koala Eco, Branch Basics, and Grove Collaborative.
Start composting. A countertop bin (Camilla loves the Bamboozle) is a low-barrier start. Composting emits 20x fewer greenhouse gases than landfilling food waste.
Adapted from My Regenerative Kitchen
All of this—the swaps, the scraps, the compost bin—sounds like discipline. But sitting in the backyard that afternoon, none of it felt that way. It felt like the most natural extension of how Camilla moves through the world: paying attention, wasting nothing, finding pleasure in the process. The menu below is where we started. Where you take it is entirely up to you.
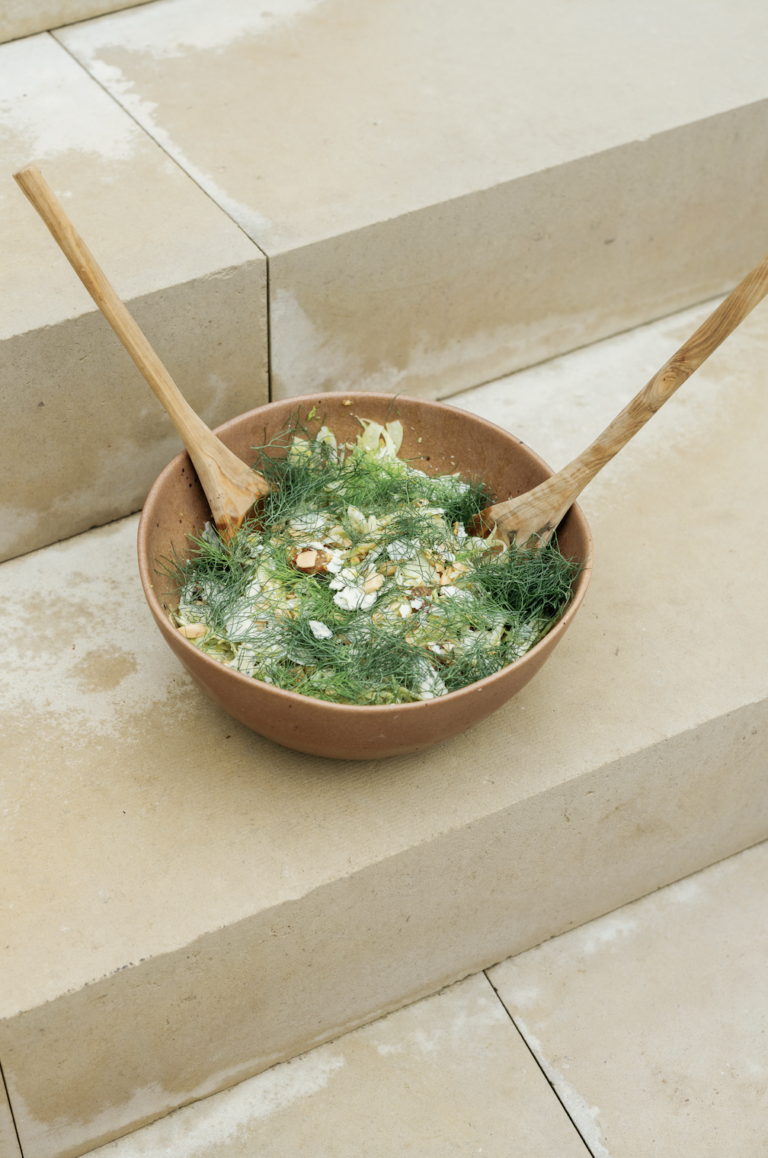
The Whole Stalk or Bulb Salad
A salad that earns its name. Every part of the fennel shows up here—fronds, stalks, bulb—and the result is crunchy and bright.
Tartines with Heirloom Tomato, Blue Cheese, and Golden Beets
The tartines came together the way Camilla cooks everything—intuitively, with whatever looked best at the market. Proof that the simplest things, made with good ingredients, don’t need much else.
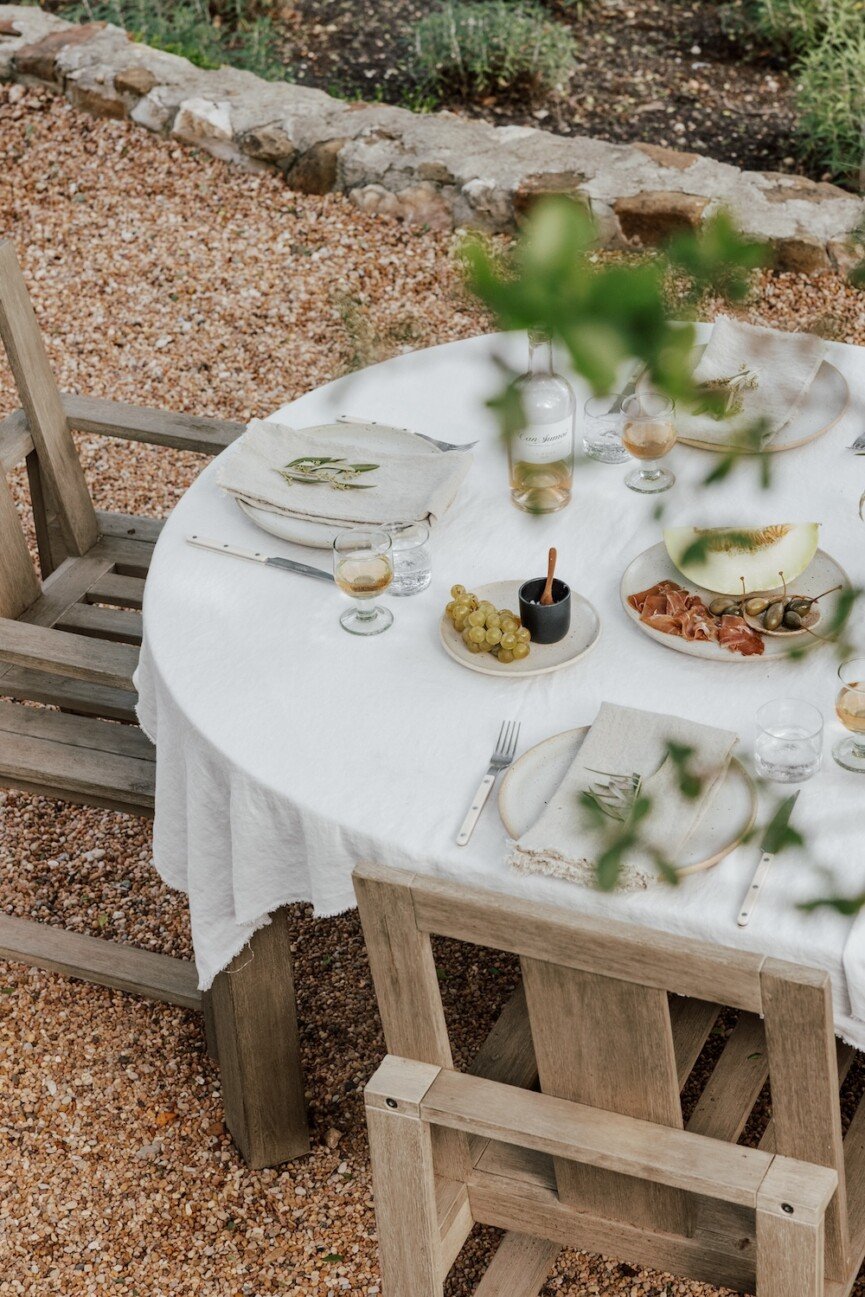
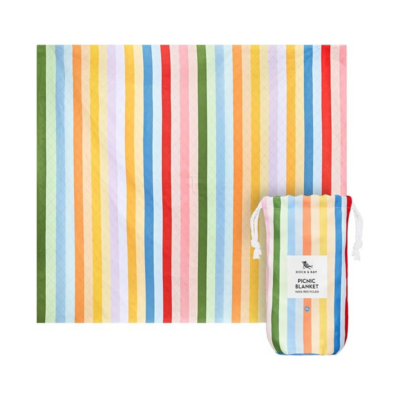
We long for the feeling all winter. Bright sun on bare arms, a breeze blowing through dappled shade, and the first ripe berries spotted at the farmer’s market. When warm weather finally returns, there’s no better way to meet it than with a picnic. And the good news is that the best ones don’t require much planning at all.
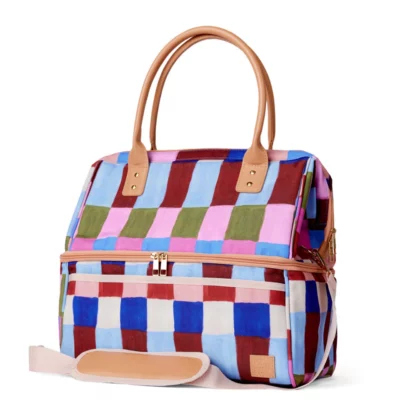
The Ultimate Picnic Packing List for Every Occasion
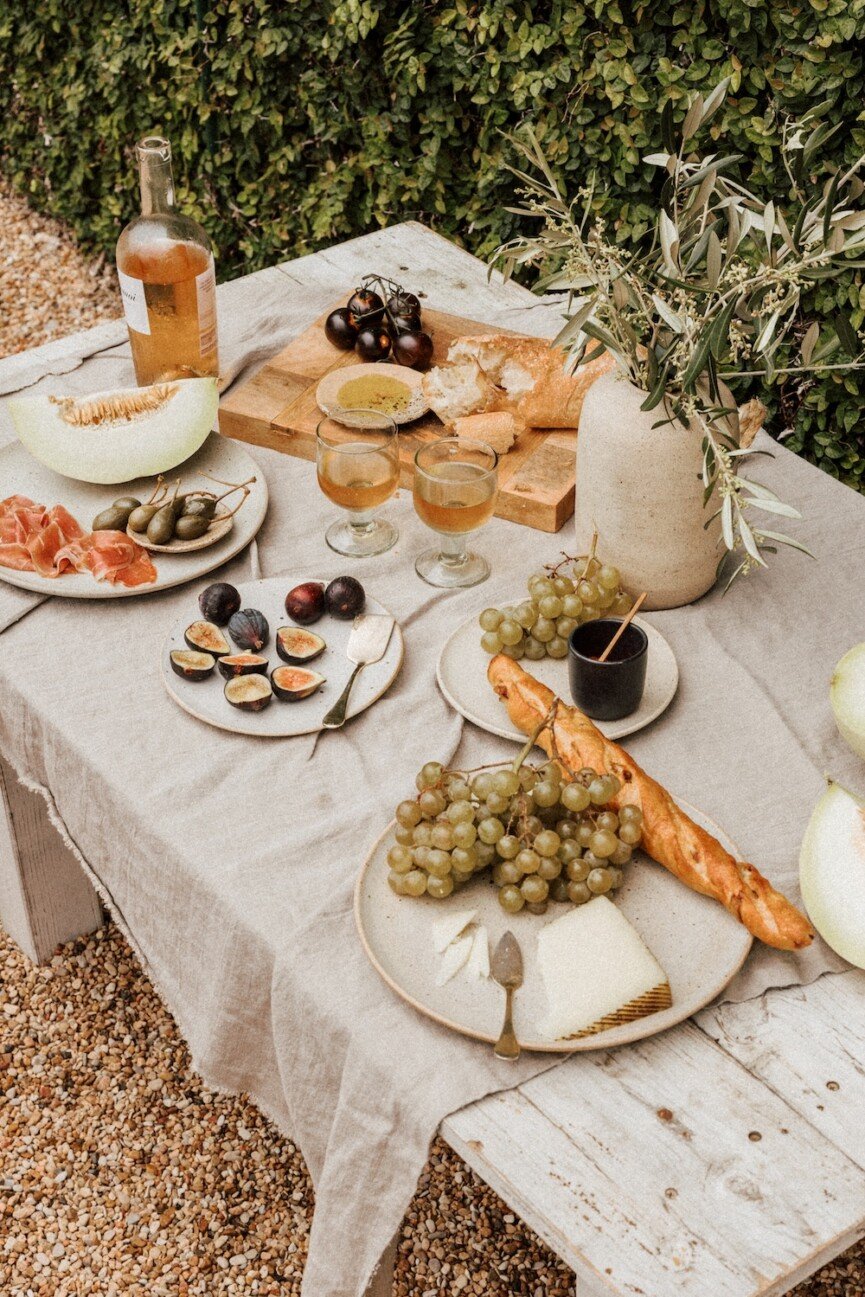
This picnic packing list is built around that idea. Whether you’re stealing an hour alone with a good book, planning a sunset spread for two, or corralling the kids for an afternoon outside, the heart of a great picnic is simplicity—the kind that slows you down and reconnects you to the details that get lost in the rush of everyday life.
A picnic is grounding, and not just because your tabletop might literally be on grass. Everything here can be found at any grocery store or deli. Just add sunshine.
Picnic Packing List for One
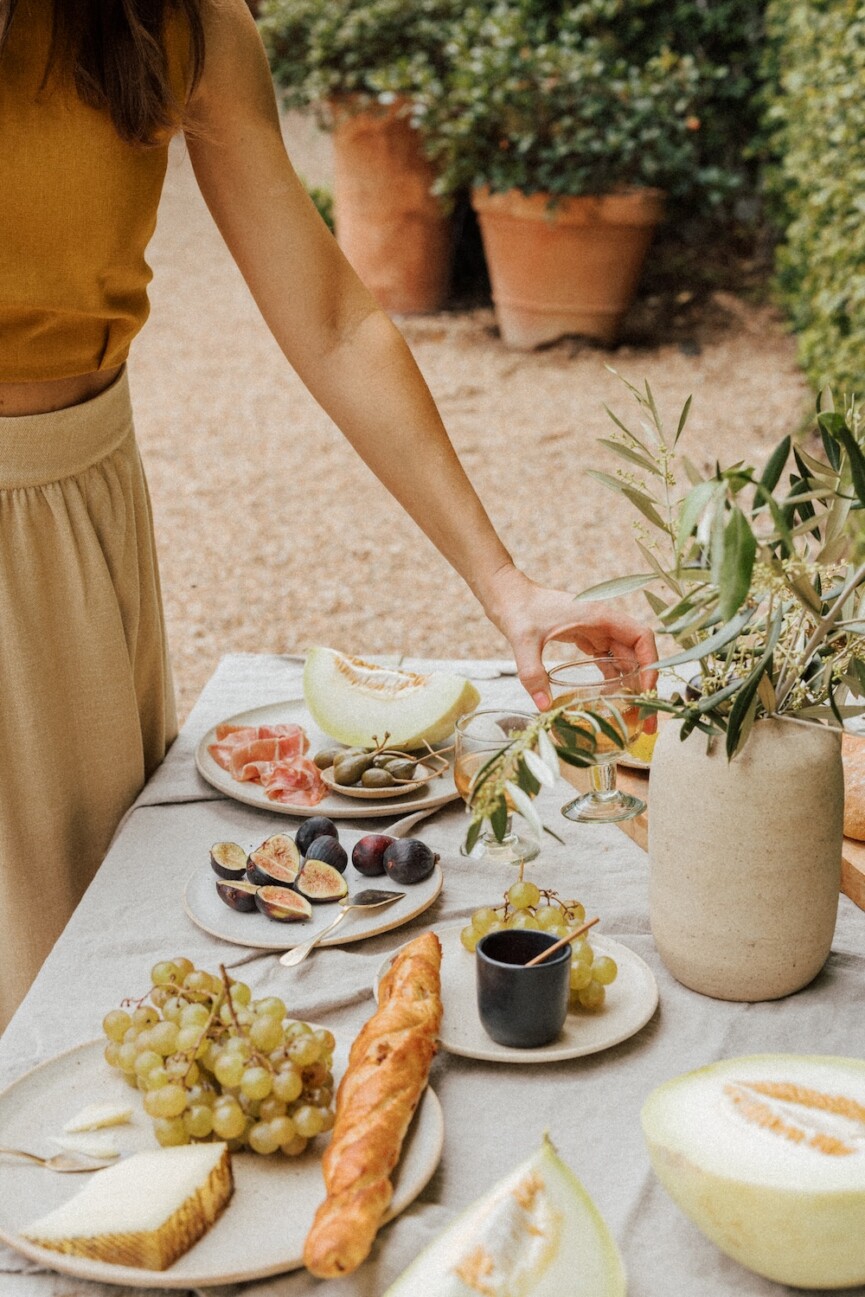
To sit outside by yourself is to give yourself a gift—one that requires almost nothing except the willingness to show up for it. Resist the urge to scroll your phone or pop in earbuds. Notice what you taste, what you see, and how the light moves. As you eat, savor the silence, even if it’s only for the length of a lunch. You might be surprised how much you needed it.
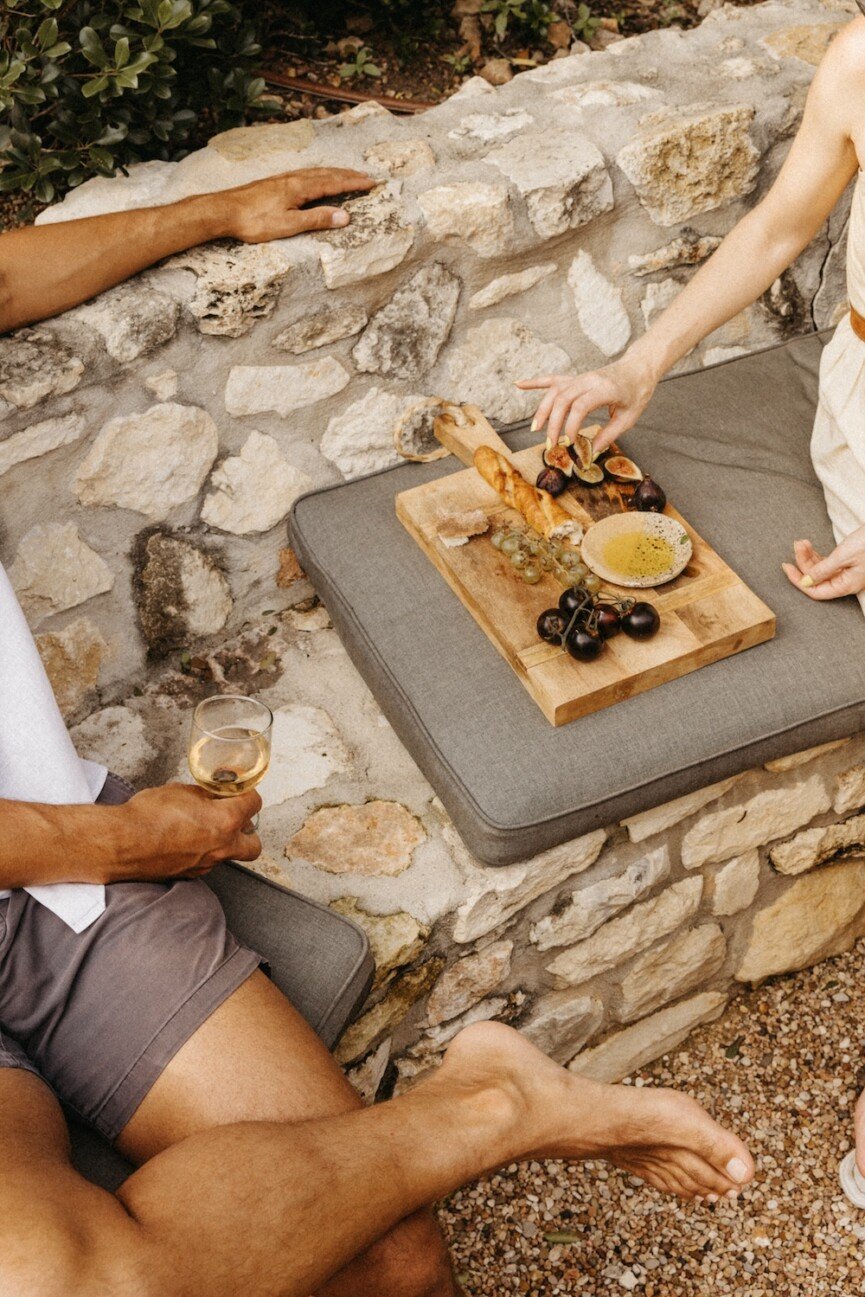
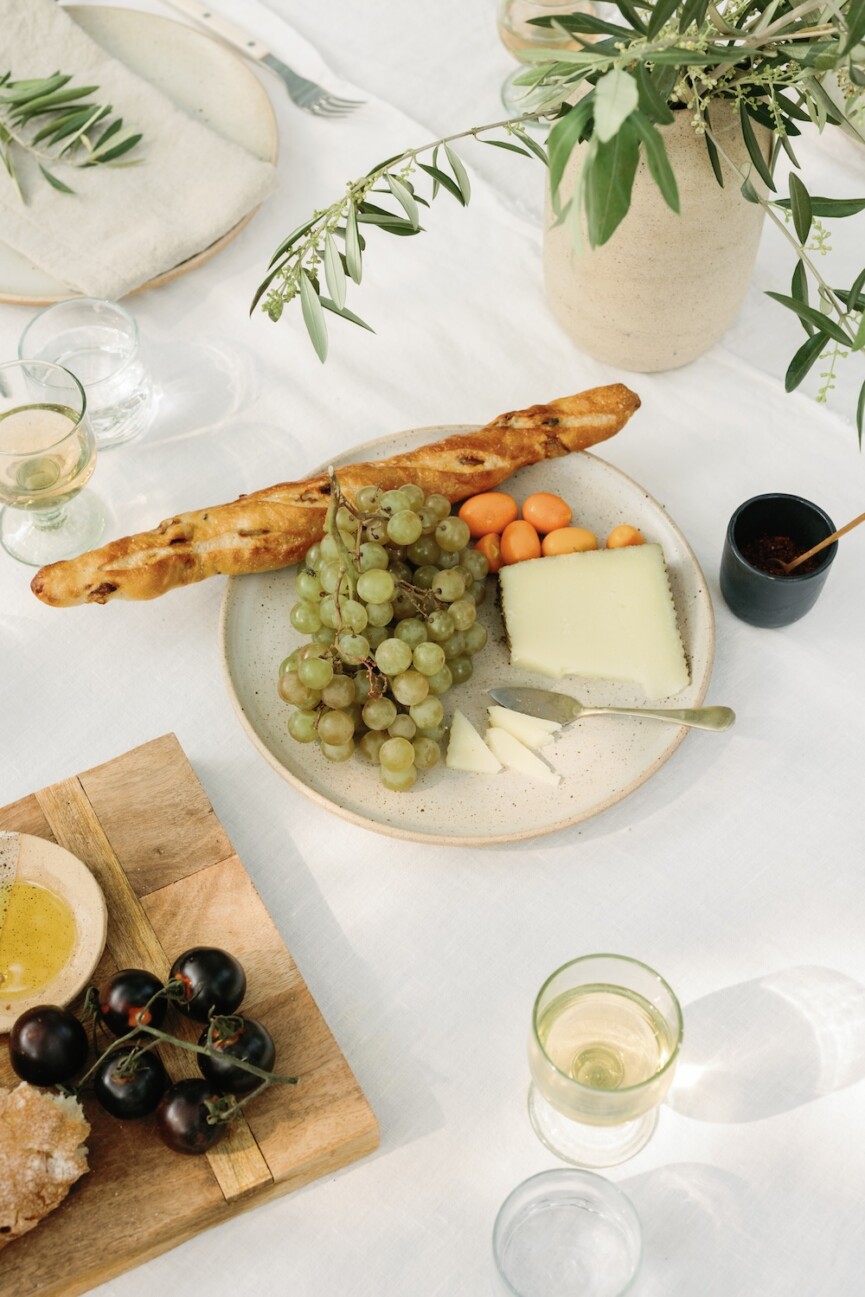
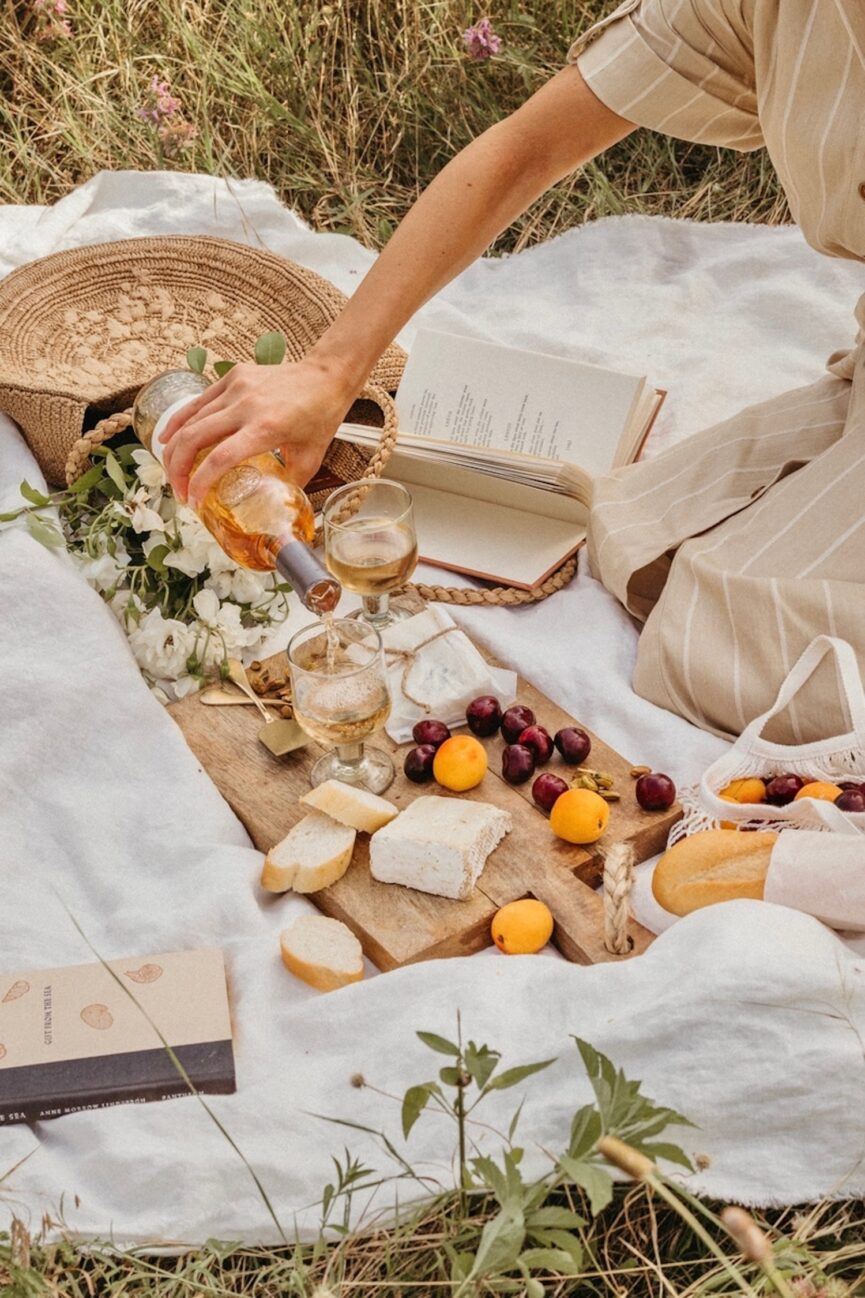
There are few settings more reliably romantic than a blanket on the ground at golden hour: shoes off, crickets in the background, a bottle passing between two people with nowhere else to be. Plan your picnic for just before sunset so you have time to catch all its colors. Let the conversation go where it wants to. Linger longer than you planned. (Cue the butterflies.)
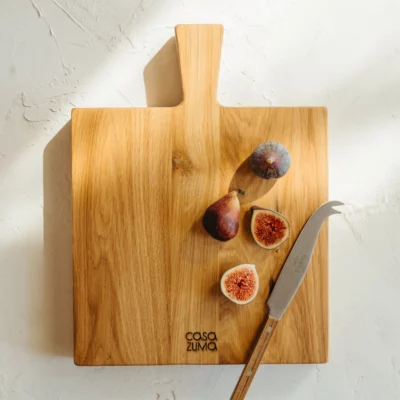
A charcuterie spread is the move here. It’s easy to assemble, impossible to rush through, and endlessly customizable to what you both love.
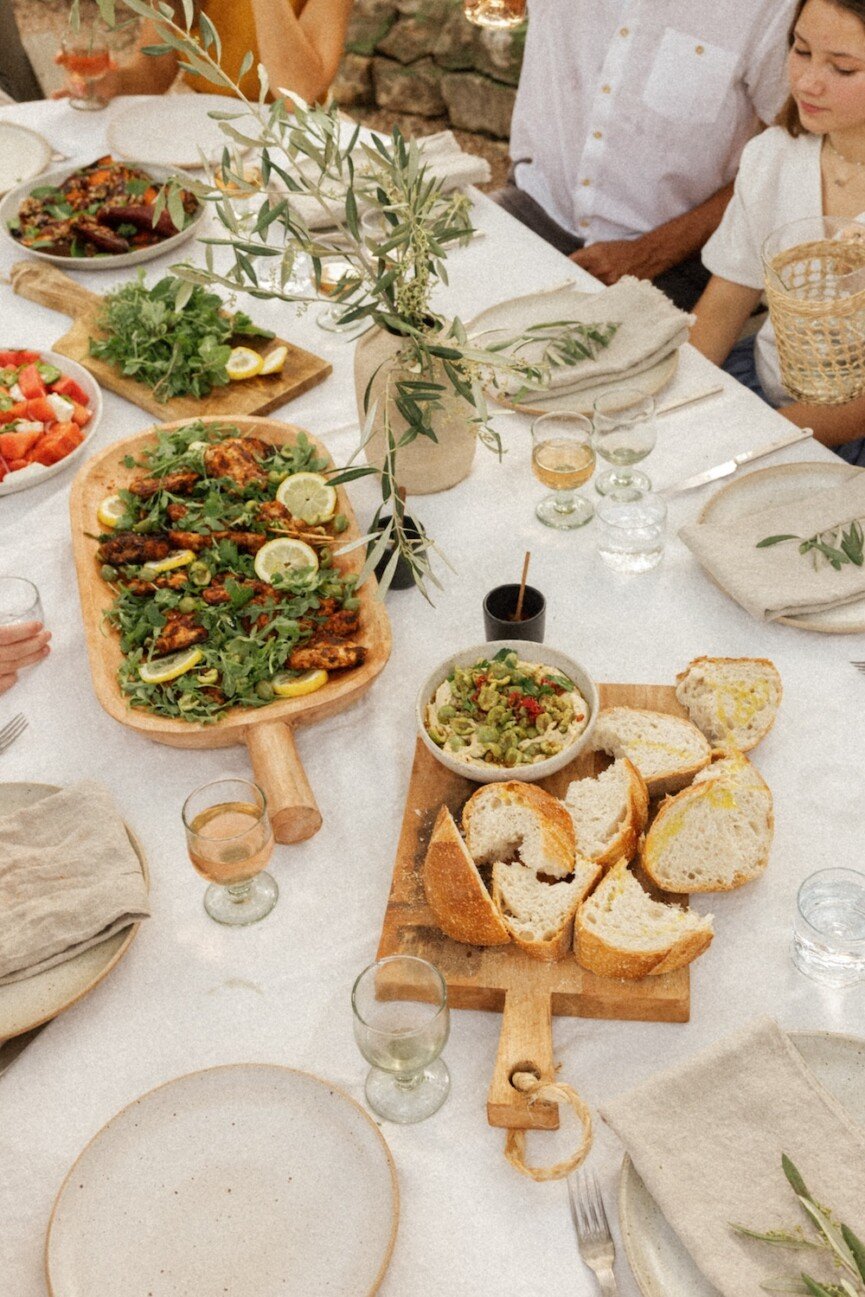
Here’s a reminder worth holding onto: as much as we think kids need to be entertained, they also thrive on imagination. A picnic is the perfect invitation for both—pack the food, then step back and watch what happens. Cloud-watching, bug-catching, rock-tossing contests in a stream.
Little minds have a way of finding wonder in exactly what’s in front of them, when we give them the space to look.
Keep the food simple and the options varied. The goal is less about the perfect spread and more about getting everyone outside and off their screens. That includes you.
We’re in that sweet stretch now—past the unpredictability of early spring, not quite into the full heat of summer. The evenings are long and the light is generous. It’s the kind of moment that doesn’t last forever, which is exactly why it’s worth showing up for. Pack the bag, find the blanket, pick a patch of grass. The best memories rarely come from the most complicated plans.
This painting was something I made last summer. I have quite a collection of saved project ideas and inspiration, and one of them was a field of round flowers. I had recently invested in a dehydrator, so I though, why not? I had saved the container (crate, box, ?) that a neon sign came in... Go To project
Little-known fact: I started my career as an event planner for a catering company. It was actually the perfect first job for me, combining my passions for food, design, and gathering people together. (The downsides included insane hours and high-stress clients, but it was a good experience for 22-year-old me.)
Though I’ve long been out of the event planning biz, I still love to host a party. But instead of the champagne towers and elaborate dessert bars of my past life, today my ideal type of gathering is a casual, kick-your-shoes-off affair, preferably outside in the sunshine. After all, everything tastes better al fresco!
That said, anyone who’s ever invited people for a casual backyard dinner knows: an outdoor party comes with its own set of challenges. Blazing sun, pesky mosquitoes, maintaining food temperatures (and keeping the flies away) are details that can make or break the festivities. My background in catering, combined with the countless parties I’ve thrown through the years, has taught me some invaluable lessons that I employ to make my own gatherings feel (almost) effortless.
So today, we’re rounding up the most frequently asked questions I get about how to host a summer party. I hope that you’ll be inspired to find the next open evening on your calendar (yep, weeknights work, too!), shoot a few texts to some friends, and grab some snacks to whip up a simple, delicious spread.
Read on for a handful of my tried-and-true secrets, menus, inspiration, and planning advice you need to host in style all season long.
Q: What’s the best way to invite people to a casual summer party?
A: Three words: keep it chill. An invitation sets the tone, so for a simple outdoor party, don’t overthink it! In my opinion, a group text or email is the way to go. And I’ve found that when I make things really easy on myself, I’m naturally inclined to invite friends over more frequently. In addition to arrival time, I like to let people know the approximate time we’ll be eating so we’re not firing up the grill multiple times over the course of an evening (i.e., “come at 4 to swim, burgers at 6!”)
It’s also helpful to provide a loose dress code so people know what to expect. Swimsuits? Shorts? Summer dresses? Since summer parties can have drastically different dress expectations, everyone will appreciate a few clues as to what they should wear.
Q: What are some simple menu ideas? I feel like I’m always stuck in the kitchen while everyone else is outside having fun.
A: I have a few strategies to keep the menu simple—the one I choose will depend on the type of party and who’s coming. Here are some ideas to get you started:
Snacks for dinner. Summer is the perfect time to curate a delicious spread of store-bought staples with a few artisanal treats. Assemble a snacking board full of delicious cheeses, olives, crudités, dips, dried fruit, nuts—really, your options are endless. Green goddess dressing is downright addictive, and the perfect accompaniment for any type of seasonal veggies.
Semi-homemade feast. The goal is to relax and hang out with your guests, so no matter how experienced a party thrower you are, it’s great to have a few hacks up your sleeve. To save tons of time, try a “semi-homemade” approach. Buy the main course from a fave spot (like a roast chicken from the deli, or bagels from your favorite bakery) and fill in with homemade sides and salads that can be made in advance and will make it feel like you cooked it all.
Throw it on the grill. Rule #1 when planning a menu: you don’t want to include anything that will have you cranking out food like a short-order cook when guests are there. Which is where the grillreally comes in handy. I like to have my proteins already marinated or seasoned before guests show up so that all that’s left to do is throw them on the grill. Often, I’ll also grill the veggie sides to keep things really easy on myself—and keep clean-up to a minimum!
A: Grilling is one of the most low-maintenance ways to cook for a group—with a little know-how. Here are my tips for grilling clean-up that save tons of time:
Oil the Grill Grates: Before grilling, oil the grates to prevent food from sticking. Use a brush or paper towel dipped in oil.
Pre-Clean the Grill: While the grill is heating up, use a grill brush to scrape off any residue from previous cooking sessions.
Marinate in Bags: Marinate meat and vegetables in resealable plastic bags. This reduces the number of dishes you need to clean. Then I use tongs to transfer them straight from the bag to the grill, so the only dish that’s actually getting used is what you’re serving it on.
Clean While Warm: After cooking, while the grill is still warm (but not hot), use a brush to remove any remaining food particles.
Q: What should I serve to drink that won’t leave me refilling glasses all night?
A: I sound like a broken record, but the key is to keep it as simple as possible—less time spent bartending means more time sipping cocktails yourself! For just about any summer occasion, you can get away with 3 drinks and call it a day:
A fun batched cocktail. Sangria, margaritas, punch—pre-mix a big pitcher, then let guests help themselves. A few favorite pitcher drinks? This Mezcal Paloma and this Strawberry Rosé Sangria are about as summery as they come. Aperol Spritz is a summer cocktail beloved by all, perfect for an Italian menu. Or, try a Blood Orange Margarita for a delicious twist on a classic.
A rosé or a white wine. This is a perfect thing for guests to contribute when they ask what they can bring to the party.
Flavor-infused water. Fill a large carafe with water and add fruit or herbs for a festive touch. Bonus points for providing a fun non-alcoholic option like sparkling lemonade or iced tea.
A good rule of thumb is to plan for 1 1/2 drinks per person per hour. And at an outdoor summer party, always have more water and ice than you think you’ll need.
Q: What if it’s super hot on the day of my party?
A: Again, have way more water at the ready than you think you’ll need! And—sunscreen is a non-negotiable. Do your guests a favor and have some sunscreen available for them to reapply as needed (browse our favorite clean options). I love the look of outdoor umbrellas, and I typically scatter 2 or 3 around a party space for lifesaving shade.
Q: What are some good outdoor activities to keep the vibes high?
A: Go all in on the carefree vibes of summer and plan some classic party games and activities to make your gathering unforgettable. A few of my faves:
Yard games like bocce ball, croquet, and cornhole are great for encouraging people to let loose and have a good time together.
Music is crucial to the vibe, so don’t leave this to chance. My favorite for hanging out and eating dinner is the Daybreak playlist from Casa Zuma. And you can always turn up the beat as the night goes on and see if an impromptu dance party breaks out.
Q: How can I cut the small talk and have engaging conversations?
A: You’re speaking my love language—good conversation is the key to any gathering! We put together a list of conversation starters to inspire thoughtful and engaging chats. Keep a few of these in your back pocket and you’ll step into every interaction with confidence (and curiosity!) And I guarantee, the party will never get boring.
Hosting is a practice, and gathering with loved ones is an opportunity to savor the sweetness of the season. We only get so many summers in our lifetime, after all, and squeezing every bit of joy out of it is well worthwhile. So light the candles, chill a few bottles of wine, and let the season do what it does best: bring people together.
This post was last updated on June 12, 2026, to include new insights.
‘Tis the season! The summer season, that is. The sun is shining, flowers are blooming, and visions of poolside lounging and weekend getaways are dancing in nearly everyone’s heads. This time of year also brings ample opportunities for entrepreneurship. From teachers yearning to boost their bank accounts during their summer downtime to retirees looking to earn extra income and expand their social network to teens driven to gain valuable work experience on their own terms, the season is ripe for bringing business ownership dreams to life. But where to begin? In this post, I’ll step you through the mission-critical considerations and tasks involved.
1. Choose the Right Business Idea for You
Not every summer business will be a practical choice for you. Consider your lifestyle, skills, available time, personal preferences, and financial situation. Businesses vary in their schedule flexibility, the time they require, startup and ongoing operational costs, physical demands, and other aspects.
Here are some examples of businesses with different demands and overhead:
Lawn care (physical tasks, equipment and fuel costs, daytime hours)
Swim instructor (flexible hours, specialized expertise and safety certification, minimal startup and ongoing costs)
Pet sitting (restrictive schedule, minimal startup and ongoing costs, high degree of responsibility)
Ice cream truck (a lot of interpersonal interaction, considerable startup and overhead costs, flexible schedule)
Pickleball or tennis coaching (flexible schedule, athletic skills and sports knowledge, low startup and overhead costs)
Also, validate that your idea is viable before fully committing to it.
Talk with potential customers. Is there a need for your product or service? Is the market already saturated with businesses that fulfill that need?
Research local competition. How will you differentiate yourself?
Run the numbers. Determine your costs and revenue potential. Can you make money starting and running this business? How long will it take to turn a profit?
Even a summer business deserves a solid foundation or you could end up with a result equivalent to building a sandcastle on wet sand. And if you have your sights set on reviving your business activities next summer (or continuing them into the fall or winter months), then the stronger your plan, the easier it will be to move forward.
2. Tackle the Startup Basics
Legal Structure
If you’re reading this article, I’m assuming you’re aiming to operate your summer venture as a business, not a hobby. Still, I think it’s important to explain the difference from a legal and tax perspective.
Generally, the IRS considers a money-making venture to be a business if the intention behind it is to make a profit. Under the One Big Beautiful Bill Act (OBBBA), hobby income is taxable but only the cost of goods sold is tax-deductible. The OBBBA permanently eliminated deductions for costs such as home office expenses, vehicle mileage, and software subscriptions when a venture is operated as a hobby. If operating a business, the entrepreneur may deduct those and other ordinary and necessary expenses when calculating their taxes. Another important distinction from a tax perspective is that hobbyists do not pay self-employment taxes (Social Security and Medicare) whereas business owners do.
Another major difference is hobby activities are not associated with a business structure, but if you’re operating a business, you must decide on its entity type.
This is one of the most important decisions that you’ll make for your summer business because it will have both legal and tax implications.
Sole Proprietorship: This is the simplest form of business, requiring no formal entity registration with the state. By default, a one-owner business will be considered a Sole Proprietorship by the state and tax authorities. All profit and loss flow through to the business owner’s personal tax returns. Financial and legal liability for the business is completely on the business owner. Any debts or legal actions against the business are the sole responsibility of the business owner, putting the individual’s personal assets at risk.
General Partnership: Any business owned by multiple individuals is considered a partnership if the owners have not registered it as a formal entity. Profits and tax obligations flow through to the individual owners, who are responsible for all debts and legal actions against the business. As with a Sole Proprietorship, a General Partnership owners’ personal assets are at risk if the company cannot pay its bills or is sued.
Limited Liability Company: This business structure requires filing formation documents and designating a registered agent in the state. It’s a popular choice because it retains most of the administrative simplicity of the Sole Proprietorship/Partnership structures with the liability protection of a Corporation. While the business owner(s) are responsible for the LLC’s tax obligations (profit and loss flows through to their personal income tax returns), the company is a separate legal entity. This distinction protects the LLC owners (members) from personal liability for the business’s debts and legal issues under most circumstances. Another reason why many small business owners choose the LLC structure is tax flexibility, particularly the option to elect S Corporation status for reducing LLC members’ self-employment tax burden.
C Corporation: Although this business structure has more startup and compliance formalities than the others, it might be a wise choice for some seasonal businesses depending on their state’s tax code and legal environment. Incorporating as a C Corporation requires filing formation paperwork with the state, designating a registered agent, appointing a board of directors, adopting bylaws, and potentially completing other filings and tasks. A C Corporation is its own legal and tax-paying entity, so the business owners (shareholders) are protected from the liabilities of the business. A C Corporation is subject to corporate income tax, and some of the company’s income gets taxed twice. Dividend payments made to shareholders get taxed at the corporate level when the income is earned and then again on shareholders’ personal tax returns. If a C Corporation meets the IRS’s criteria, it can avoid that double taxation, opting for pass-through tax treatment instead by filing for the S Corporation election.
Employer Identification Number (EIN)
Most businesses (whether year-round or seasonal) need an EIN from the IRS:
Any business (regardless of entity type) that will hire employees
Any registered business entity (e.g., LLC, Corporation), whether or not it will hire employees
An EIN serves as a business’s federal tax identification number and is used for federal payroll withholdings and deductions, income tax reporting, and other purposes. Most financial institutions require a company’s EIN before opening business bank or credit accounts, and licensing agencies might request a business’s EIN before issuing licenses and permits.
Business Banking and Financial Management
I can’t emphasize enough how quickly sloppy money management can derail an otherwise promising business. Just because your business is for a season as opposed to being year-round doesn’t mean you should treat its finances with a laissez-faire attitude. A few pro tips to keep things up to date and aboveboard:
Open a dedicated business bank account (even for a short-term venture): Do not commingle personal assets and expenses with those of your company. With separate bank and credit accounts, you’ll be able to effectively track your business income, expenses, and financial performance.
Keep up with your record-keeping: Process and record income and expense activities promptly so you don’t fall behind. It’s far easier and less confusing to document transactions as they happen than it is to play catch up with a pile of invoices and receipts.
Understand your tax obligations: Besides annual tax filings, many small business owners must pay income and self-employment tax on a quarterly basis. Even if a business entity only generates income during a few months of the year, it may need to file quarterly tax returns to demonstrate that no tax is owed. And depending on the state where the seasonal business operates, other taxes and fees might apply (such as franchise tax, sales tax, gross receipts tax, etc.).
Licenses and Permits
Even a summer side hustle may need certain business licenses and permits to legally perform its work and comply with its municipality’s rules and regulations. Requirements can vary from state to state and across local jurisdictions.
Commonly required permits and licenses:
Sales tax license (sales permit)
Food safety permit
Local zoning clearances
Retail food facility license
Sign permit
Health permit
General business license
Fire permit
Construction permit
The SBA website provides a good starting point for researching which licenses and permits might apply to your summer business.
3. Build Your Brand and Get the Word Out
Whether you're mowing lawns, organizing closets, remodeling bathrooms, vending shaved ice, or walking dogs, your business won’t sell itself; you’ll need to put in some marketing effort.
Fortunately, you have many free and low-cost tools at your disposal to help you promote your venture.
Create a logo; free tools like Canva with generative AI capabilities make this easy.
Set up a Google Business Profile so potential customers in your area can discover you.
Leverage social media to raise awareness and build a following. Instagram and TikTok can be especially effective for visually driven businesses.
Print business cards. I think you’ll be pleasantly surprised by how this simple, age-old marketing tool still serves as a powerful, tangible asset for spreading brand awareness and building connections.
Network, mix, and mingle as much as possible in your local community to leverage the power of word-of-mouth.
4. Prepare for What’s Next
Do you anticipate exiting the business after this season is over, or do you plan to resume business activities again next summer? Or are you considering making your business a year-round endeavor? Your intentions will determine what comes next.
Ending the Business for Good at the Close of Summer
If you have no desire to continue your business at any point in the future, you’ll likely need to wind down operations and officially close it (selling might also be an option to discuss with your attorney and accountant). If you have formed a legal entity (e.g., LLC or Corporation), you’ll need to file articles of dissolution with the state, close out accounts, and submit any other forms and notifications to ensure all tax authorities and licensing agencies recognize your business is no longer active.
Deciding to Operate Year-Round
If you decide to go from “seasonal” to “all-in year-round,” continue to follow all federal, state, and local compliance rules to keep your business in good standing. Also, inform your existing and prospective clients that you’ll be available beyond the summer, so you can build your customer base and secure a steady, ongoing revenue stream.
In addition, consider whether your initial business structure is still the right choice for your company now that you’re going to operate all 12 months. For example, you might discover that converting from a Sole Proprietorship or LLC to an S Corporation or C Corporation could potentially be more advantageous from a tax standpoint. Discuss your situation with your accountant and attorney for guidance.
Resuming Business Activities Next Summer
Just because you aren’t selling goods or services after summer doesn’t mean your business’s compliance obligations go away. States consider LLCs, Corporations, and other registered entities as active businesses responsible for reporting, fees, and tax filings, unless the business owners have filed articles of dissolution to formally close the entity. Federal, state, and local tax authorities will require returns and reports, even if no tax is due, unless a business has officially closed its tax accounts. Also, the seasonal company’s owners will likely need to renew or reapply for the required business licenses and permits before resuming activities.
Although summer is short, it presents big opportunities for people who want to explore entrepreneurship. Ready to seize the season? There’s a lot to consider and only weeks before summer begins. Start thinking through your business idea and what you hope to achieve in the short and long term.
Over the last few decades, most photographers have believed that the more powerful the editing tool, the longer they need to spend behind a screen. Selection tools, color grading, and creative effects require layers of manual work and patience. A major update to one of photography’s oldest plug-in suites broke that pattern by taking the editing problems most photographers have accepted as unavoidable and building tools that solve them.
Bwindi Impenetrable National Park in Uganda needs no further explanation. It's a challenging landscape to navigate, and numerous animals inhabit it. But its most famous residents are the mountain gorillas.
In uncertain, often overwhelming times, I’ve found solace in my houseplants. There’s a joy in tending to them—the ritual of watering, the slow unfurl of a new leaf, and the way a room softens in their presence. Over time, my home has filled with them.
But somewhere along the way, I realized: more plants didn’t necessarily mean a more beautiful space. Too many, placed without intention, and suddenly a living room starts to feel less like a sanctuary and more like a roadside nursery. What I was craving wasn’t more greenery—it was a sense of cohesion. A way to make my plants feel like part of the design, not an afterthought.
So I set out to understand how designers actually style plants at home. What I found, through conversations with San Francisco-based Little Trees owner Kathy Ho and Lindsay Pangborn, formerly a gardening expert at Bloomscape, is that the difference comes down to perspective. Plants aren’t just décor—they’re a design layer. And when you start to think about them that way, everything shifts: where you place them, how you group them, and how they shape the feeling of a room.
How to Design With Plants (By Thinking Like a Designer)
When you start to see plants as a design element—not just something to care for—the way you use them begins to change. It’s easy to slip into collecting mode. You find a plant you love, then another, then another—and before long, they’re scattered throughout your home with little thought for how they relate to one another.
Designers approach plants differently. Instead of asking Where can I fit this? they ask, What does this room need?
That shift—from accumulation to intention—creates a space that feels considered.
“Plants should complement your space and your lifestyle, not compete with it,” Pangborn says. In practice, that means thinking about plants the same way you would any other design element: in terms of scale, balance, and placement.
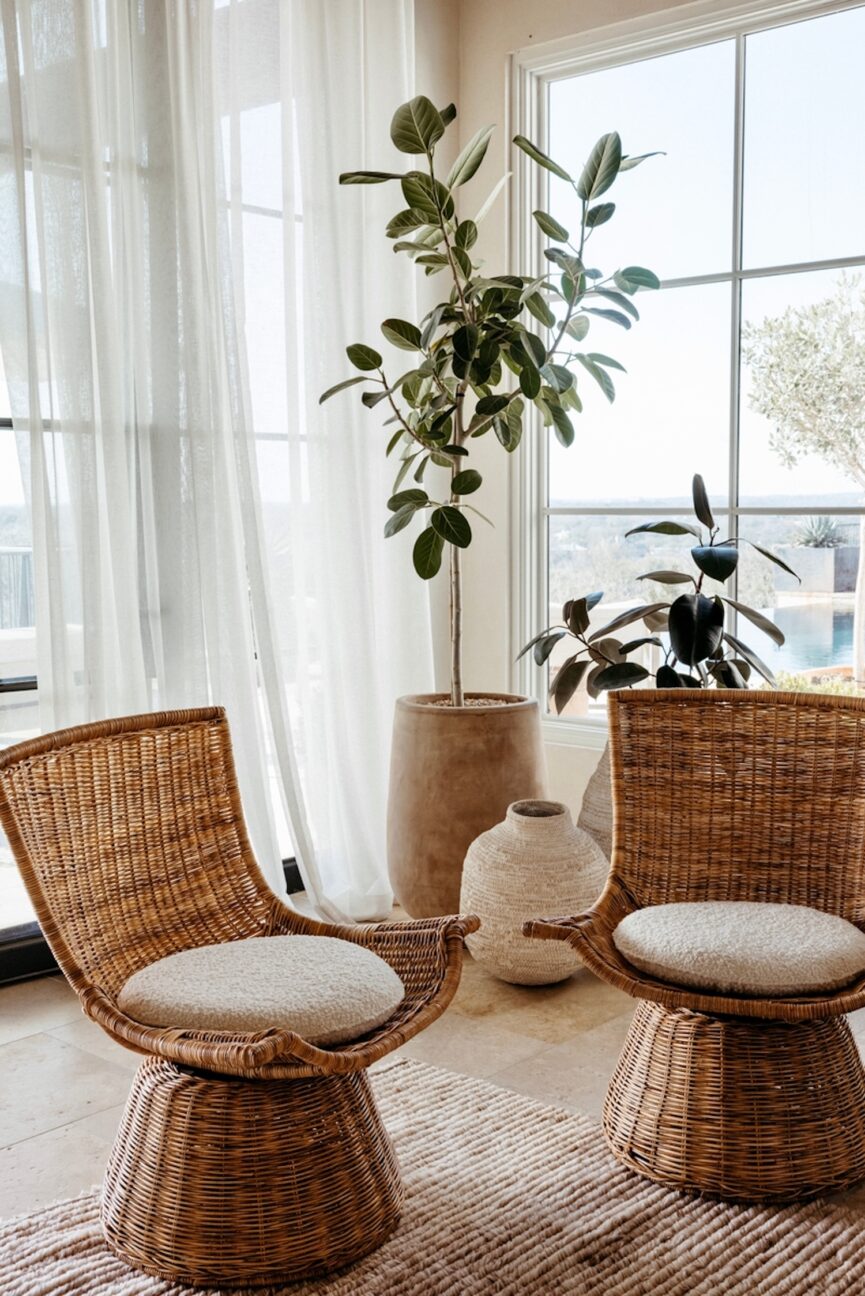
A single, well-placed plant can anchor a corner. A small grouping can create a focal point on a surface. Even negative space—what you choose not to fill—plays a role in how your plants are experienced.
1. Create Visual Moments (Not Plant Clutter)
Once you start thinking like a designer, the next step is editing—then arranging with intention. Instead of dispersing plants evenly throughout a room, focus on creating a few defined moments. Designers often group plants in twos or threes, treating them less like standalone objects and more like part of a vignette. The result feels grounded and cohesive, rather than scattered.
“Grouping plants can make a space feel more calm and considered,” says Ho. “It also makes care easier when plants with similar needs are placed together.”
Think of a cluster on a coffee table, a styled corner of a console, or a small trio anchoring a shelf. What matters isn’t the number of plants—it’s how they relate to one another and to the space around them.
Just as important: what you leave out. Giving each grouping room to breathe allows the eye to land, rather than constantly move.
One of the simplest ways to elevate your plant styling is to think vertically. When every plant sits at the same level—lined up on a windowsill or clustered at eye height—the effect can feel flat. Designers, instead, use plants to create movement throughout a space, guiding the eye up, down, and across the room.
Trailing plants are especially effective here. Placed on a high shelf, bookshelf, or cabinet, they soften hard lines and draw the eye upward as they grow. Hanging planters offer a similar effect, making use of often-overlooked ceiling space while adding a sense of lightness.
“Using vertical space is key, especially in smaller homes,” Pangborn notes. “It allows you to incorporate more greenery without sacrificing surface area.”
The goal isn’t to fill every level, but to create a sense of rhythm—something that feels layered and lived-in, rather than static. A taller plant on the floor, a cluster at mid-level, and something trailing above can be enough to shift the entire energy of a room.
3. Let Plants Fill the Space—Not Overwhelm It
One of the most common mistakes when decorating with plants is treating every empty spot as an opportunity to add one. But designers tend to approach it the opposite way. Instead of filling space, they use plants to resolve it.
That might look like placing a taller plant in an empty corner to soften a hard edge, or using a single, sculptural plant to anchor a blank wall. On the floor, especially, plants can create a sense of weight and presence—grounding the room in a way smaller accents can’t.
“Larger plants can make an immediate impact,” Pangborn says. “They help define a space and can bring balance to areas that feel unfinished.”
Just as important is what surrounds them. Giving a plant enough space—away from furniture, walls, or artwork—allows it to stand on its own without competing for attention.
A room doesn’t feel lush when every inch is filled. It feels lush when there’s contrast—between fullness and openness, presence and pause.
4. Balance Scale, Shape, and Texture
If you’re drawn to a home filled with plants, the key is to create contrast. A room full of greenery can feel rich and layered, but only when there’s variation. When every plant is similar in size, shape, or tone, the effect flattens. What designers do instead is mix elements deliberately: pairing something tall with something low, something structured with something soft, something bold with something more delicate.
“Combining plants with different leaf shapes and sizes keeps a space visually interesting,” Pangborn says. “It creates depth rather than repetition.”
Think of a broad-leaf plant set against something more airy, or a sculptural silhouette next to a trailing vine. These contrasts give the eye somewhere to move and a reason to linger.
The effect is what people often describe as a “lush” space, but what it really comes down to is composition. Not more plants, but better balance.
Design for Real Life, Not Just Aesthetics
Even the most beautifully styled plants should support the way you actually live in your space. It’s easy to get caught up in how something looks—especially when it comes to plants, which can instantly transform a room. But if they’re difficult to care for, constantly in the way, or require more attention than you can realistically give, that sense of ease starts to disappear.
“Plants should complement your space and your lifestyle,” Pangborn notes. “They should never feel like a burden.”
That might mean grouping plants with similar care needs so your routine feels intuitive. Or choosing fewer, more impactful pieces that you can tend to consistently. It might even mean moving things around as your space (or your energy) shifts.
When you start to see plants as part of your home’s design, the entire approach softens. You edit more. You place with intention, and you let the space breathe.
In turn, your home begins to feel the way you wanted it to all along: lush, yes—but also calm, cohesive, and entirely your own.
This post was last updated on April 17, 2026, to include new insights.
Of all the rooms to style (and sustain) in my home, the guest bedroom is where things seem to click. Unlike the primary, there’s less pressure to get things just right—it’s an opportunity to get more playful with patterns, lighting, and design styles. And because it’s the space in our home designed to be a welcome invitation to others, there’s a motivation to make it a warm, cozy retreat when guests come to visit.
Because the best guest bedroom ideas don’t just focus on styling, they prioritize comfort. When someone stays in your home, what they remember most isn’t the decor—it’s how they felt. Did they sleep well? Did the room feel peaceful? Were they taken care of?
With a few thoughtful touches—from cozy bedding to practical storage—you can transform even a small guest room into a warm, welcoming retreat.
Prioritize a Bed That Makes Sleep Easy
If there’s one place to focus your energy in a guest room, it’s the bed. The most important thing a guest will do in this room is sleep, so the bed is more than just a pretty focal point. It should be inviting—and deliver on comfort.
Start with clean, comfortable bedding. Soft sheets, supportive pillows, a thick duvet, and an extra blanket at the foot of the bed are the perfect base. You never know if guests run warm or cold at night, so layering textures instantly makes the space feel thoughtful and cozy.
A beautiful guest room means very little if your guests can’t sleep well. Next to a comfortable bed, light and noise can make or break a good night’s sleep. Blackout curtains or lined drapes help block early morning light and make it easier for guests to rest—especially if they’re adjusting to a new environment or time zone.
Even in lighter, airier spaces, choosing window treatments that soften or darken the room at night can make a noticeable difference. And if blackout curtains feel too heavy for your aesthetic, look for layered window treatments that combine sheer curtains with a thicker panel for nighttime.
Guest rooms tend to feel most welcoming when the palette is soft and neutral. Light blues, warm whites, and sandy beiges create a calm backdrop that appeals to most people and helps the space feel brighter—especially if the room is on the smaller side. That said, don’t be afraid of being more playful in the space, especially if you’ve got an idea that might not make sense in another room—a color wash you want to try, bedding that feels less safe, or wall art that needs a home. You can still simplify around the unexpected design touch by keeping accents tonal or soft.
Keeping the palette simple also allows cozy textures like linen bedding, woven accents, and soft throws to take center stage. The result is a room that feels peaceful, uncluttered, and easy to relax in.
Layer the Lighting for Comfort and Flexibility
Lighting has a huge impact on how a room feels—especially at night. Instead of relying on one overhead light, layer a few different sources so guests can adjust the space to their needs. A bedside lamp makes it easy to read before bed, while a softer ambient light creates a calm, relaxing atmosphere.
If space is tight, consider wall-mounted lighting instead of table lamps. It frees up surface space while still giving guests the ability to control their lighting without getting out of bed. Warm, dimmable light instantly makes a guest room feel cozier and more restful.
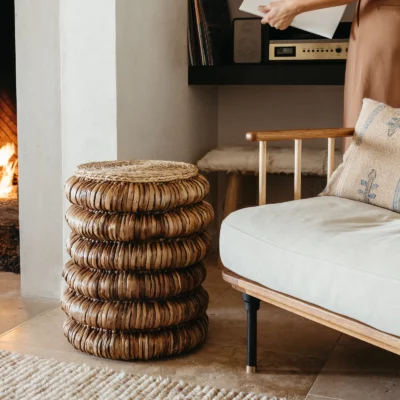
Guest bedrooms are often smaller rooms in the house, but a few thoughtful choices can make them feel much more comfortable. Look for furniture with a smaller footprint—taller nightstands, round ottomans, or benches that double as seating and storage. Wall-mounted lighting can also free up valuable surface space. This allows the bed to remain the focal point while still leaving room for guests to move around comfortably.
One of the simplest ways to elevate a guest room is by giving visitors a place to open their suitcase. A folding luggage rack, bench at the foot of the bed, or even a small stool provides a convenient landing spot for bags and prevents guests from having to place their suitcase on the floor or bed. This small addition makes unpacking easier—and keeps the room feeling tidy throughout their stay.
Even for a short stay, having a place to put things makes guests feel more settled. You don’t need a full dresser to make this happen. An empty drawer, a luggage rack, or a few wall hooks can be enough to help guests unpack and organize their belongings.
Smaller nightstands can also work well in guest rooms since most visitors only need space for a few essentials. In tighter spaces, try pairing a nightstand on one side of the bed with a small ottoman or stool on the other—it doubles as both a drop spot and extra seating.
The goal is simple: create a space where guests don’t feel like they have to live out of their suitcase.
Create a Thoughtful Nightstand Setup
One of the easiest ways to make guests feel cared for is through the small details. A thoughtfully arranged nightstand might include a reading lamp, a glass of water, tissues, a small noise machine, and a place to charge a phone. These are the little conveniences people often miss when they’re away from home.
It’s also helpful to keep a small kit of essentials nearby—things like toothpaste, cotton pads, or extra hair ties in case someone forgot something while packing. These quiet touches make a stay feel effortless.
The most memorable guest rooms often include a few unexpected comforts. A basket with extra washcloths, cozy slippers, or a soft throw blanket instantly makes guests feel at ease. Even something as simple as a plush robe can make the room feel more like a boutique hotel than a spare bedroom.
One of my favorite ways to make guests feel at home is to place a book or magazine on the nightstand—something they can flip through as they wind down at night. These small gestures feel simple, but a little thoughtfulness goes a long way.
Keep Fresh Towels Within Reach
Ever stepped out of the shower at someone else’s house only to realize you don’t know where the towels are? Folded towels on the bed, draped over a bench, or neatly stacked in a basket signal that everything they need has already been thought of. Personally, I keep the guest towels separate and tucked away in the guest dresser, so they’re always fresh and ready to go (and so my kids don’t destroy them in between visits).
Bring in Soft Textures
Texture is what transforms a guest room from functional to cozy. Layering soft materials—linen bedding, woven blankets, plush throws, and textured pillows—instantly warms up the space and makes it feel inviting. These tactile elements also help neutral color palettes feel more interesting without overwhelming the room.
Think of texture as the finishing touch that makes a guest room feel lived-in and welcoming rather than overly styled.
Add a Mirror and a Few Getting-Ready Essentials
I’ve found that the single thing most guest rooms miss is simply a mirror. A full-length mirror or wall mirror helps guests check outfits and get dressed without needing to occupy the bathroom for long stretches of time. If space allows, placing a small tray nearby with a few basics—like a lint roller, tissues, or a small jewelry dish—can make the space feel even more thoughtful.
Add Personal Touches That Make Guests Feel Welcome
The most memorable guest rooms feel personal, not staged. This is the fun part: Fresh flowers on the nightstand, a favorite candle, or a small stack of books instantly add warmth to the space. Even a simple handwritten note welcoming guests can make the room feel thoughtful and intentional.
The Best Guest Bedroom Ideas Focus on Comfort
At the end of the day, the most memorable guest rooms aren’t the most elaborate—they’re the ones that make people feel cared for. A comfortable bed, soft lighting, thoughtful amenities, and a few personal touches go a long way toward creating a space where guests can truly relax. Because when someone feels rested, welcome, and at ease in your home, that’s the experience they’ll carry with them long after their visit ends.
This post was last updated on March 14, 2026, to include new insights.
The rise of artificial intelligence is transforming every corner of the creative industry, providing AI for cartoonists a new and fascinating application. From concept art to animation, AI for cartoonists offers a powerful set of tools that can enhance creative processes, speed up workflows, and even provide fresh ideas. But as these tools become more […]
Whether it’s a busy weekday or a lazy weekend, there’s never a bad time for a warm, comforting breakfast. With an emphasis on the word ‘quick,’ it’s time to lean on the Instant Pot. It’s a convenient kitchen gadget you’ll want in your cooking lineup, if it’s not already there.
Today, we’re using it for oatmeal — hearty, whole-grain bowls ready in 8 minutes of pressure cooking, plus 5 minutes of natural release, while you’re getting ready for work. (Read: No stirring, burning or standing at the stove!)
The steps are simple: combine liquids and oats, seal the pot, and cook — then serve immediately with your favorite toppings or portion into jars and refrigerate for the entire week.
A few notes: For best results, a low-fat or non-dairy milk works well — high-fat milks like coconut milk may separate during cooking. You’ll also need less liquid than you would on the stovetop — in the Instant Pot, liquid is absorbed rather than evaporated, so go easy to avoid oatmeal soup.
Active time: 10 minutes | Total time: 20 minutes
Pressure Cooker Oats
Ingredients
2 cups (160g) old-fashioned oats
2 cups (480g) water, divided
2 cups nonfat milk (almond, hemp, coconut and soy also work)
1 tbsp chia seeds
1 tbsp flaxseeds
1 tbsp hemp seeds
1/2 tsp salt
1 tbsp maple syrup (optional)
Directions Insert the steamer rack inside the inner pot of your Instant Pot and add 1 cup of water. In a 4-cup heat-safe bowl, combine the oats, remaining 1 cup water, milk, salt, maple syrup, and seeds, and stir to combine.
Place the bowl on top of the steaming rack and secure the lid on the Instant Pot. Set the valve to “sealed” and cook on high pressure for 8 minutes.
After cooking is complete, allow the pressure to release naturally for 5 minutes, then carefully release any remaining pressure by turning the valve to vent using a wooden spoon.
Carefully remove the bowl from the Instant Pot. Serve the oatmeal with your favorite toppings, or allow to cool completely before transferring to airtight containers and refrigerating for up to 5 days.
 See how you can decorate Easter eggs in beautiful and unique designs with these 7 different methods. These colored eggs are easy for kids and adults alike to create! Why we love this project Decorating Easter eggs is a fun tradition for many, and it’s not just for kids! We’ve experimented with lots of different... Go To project
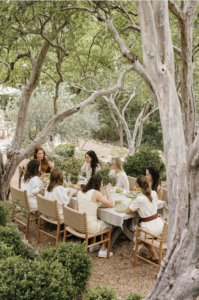


 This painting was something I made last summer. I have quite a collection of saved project ideas and inspiration, and one of them was a field of round flowers. I had recently invested in a dehydrator, so I though, why not? I had saved the container (crate, box, ?) that a neon sign came in...